Saturday, November 3, 2012

Hearty Breakfast Skillet

Oh man, this was the best breakfast EVER. Says the husband as I type this, "This was the best skillet I've ever had." I mean, you can't beat that kind of feedback, right? It was a blast, because we made it together - Joef taking charge of the bacon and veggie-chopping, me watching the potatoes, eggs, and putting it all together.

We both agreed that, considering all the different elements involved, it wasn't too much mess, either; and certainly, not difficult, especially with a cup of coffee in hand. I almost always order a skillet if it's on the menu - so why not make 'em at home?

Here's all you need (this would serve four if you added two more eggs - we had copious leftovers):
1 lb (or so) potatoes, cubed - we used these tiny little round guys, about the size of a bird egg, that came in a mix of purple, Yukon gold, and red! 
Butter
1/2 white onion
4-5 Thai green chiles
2-3 smallish bell peppers - we had purple, green, and yellow heirlooms, which were awesome - but you could substitute bells 
Rosemary, pepper, and salt for seasoning
1/2 lb bacon
1/2 large (green heirloom) tomato
Sharp cheddar cheese (Wisconsin, of course), shredded
2 eggs, over easy

Start by boiling the potatoes until they've softened, but still retain some firmness. In the meantime, you can chop the veggies and cook the bacon (here's where it's nice to have a helper!). When your ingredients are prepped, generously grease a large pan with some butter, and add the onions and chiles. Cook them on medium-high heat until the onions start to soften, adding a couple spoonfuls of bacon grease (oh yeah) from the bacon that's cooking. Add your peppers and let them saute and soften a bit as well. Add a few torn rosemary leaves, and season with salt and pepper to taste. Stir from time to time. Stir in the potatoes. A couple more spoonfuls of bacon grease sure doesn't hurt.

Cook until the potatoes and onions start to brown a little. Add in the bacon. Add the tomato at the very end. Remove from heat, then top with cheddar and a fried egg over-easy. Enjoy the glory of a full-on food coma!

Saturday, October 27, 2012

Homemade Jam

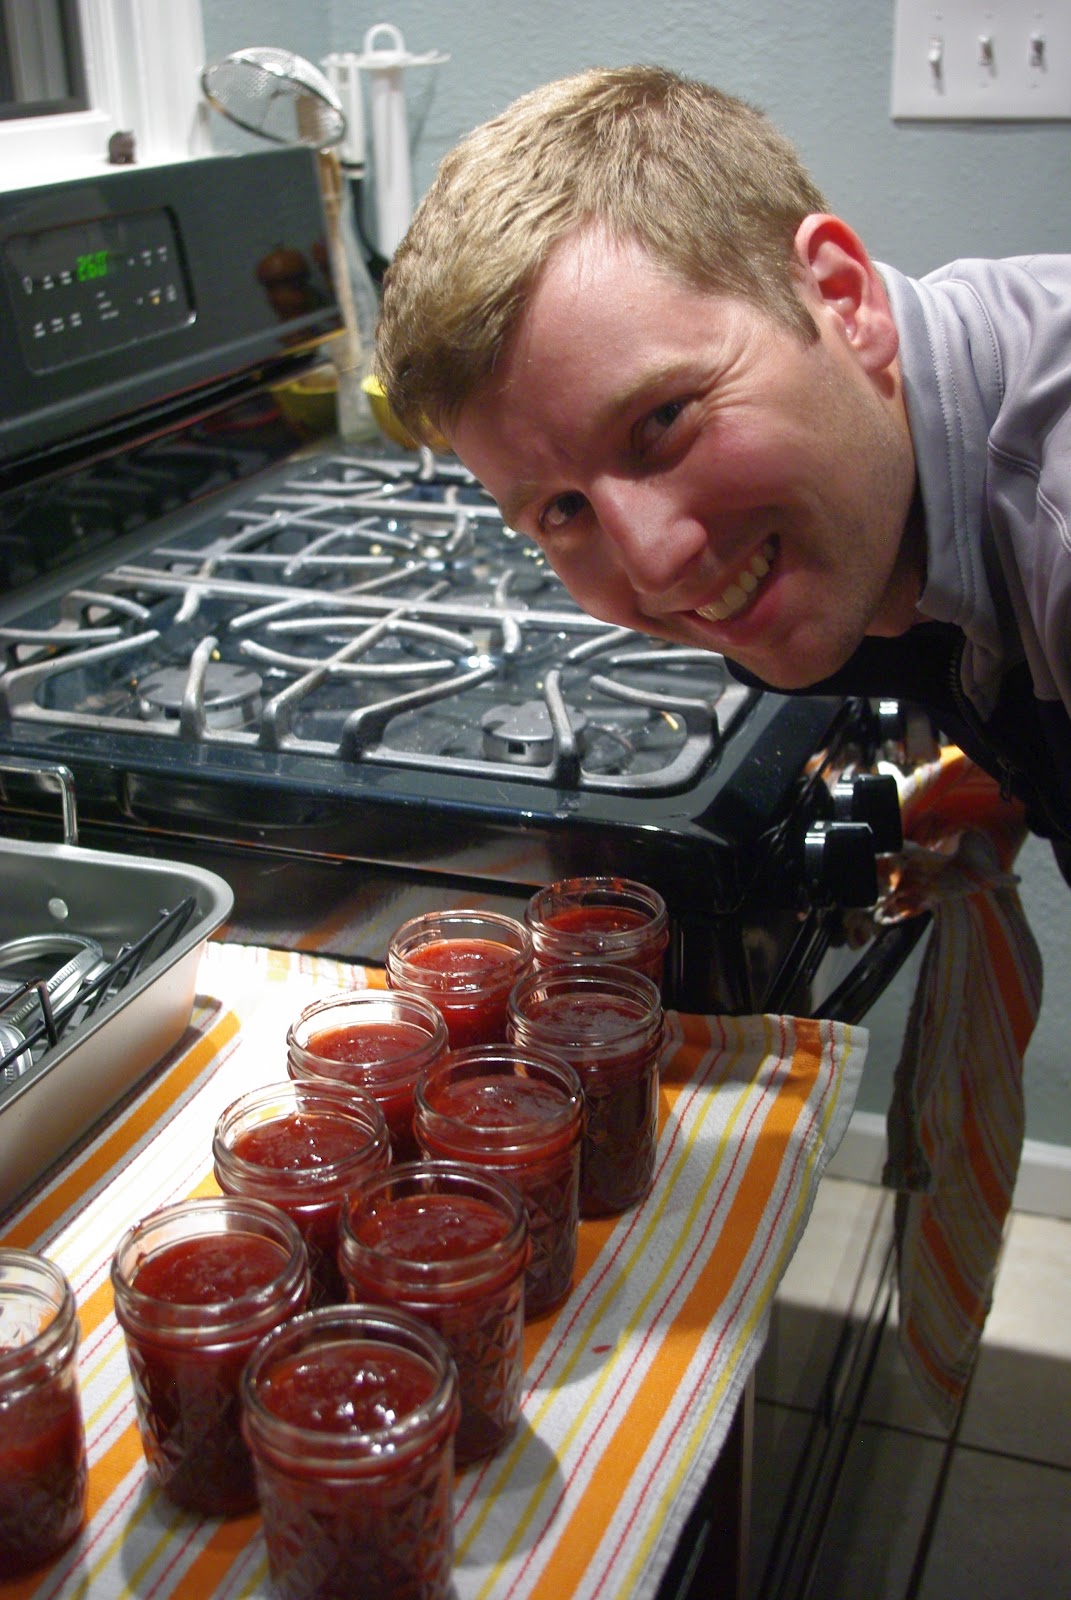
Joef and I recently discovered the joys of making homemade jam. On a whim one night, we went to the local grocery store. I asked the first staff person there where I could find the jamming jars. We found them, and then she hovered around. "What kind of jam are you making?" "Oh, I donno...we were thinking peach?" "Oh." "....Do you, um, have any suggestions?" Did she ever! About twenty minutes later, she had sent us off with recipe ideas, guidance on how to seal and purify the jars, instructions on how to make jam without pectin, proportions...pretty much everything you ever wanted to know about jamming. Including the fact that it's called "jamming", and those who jam regularly are called, as she referred to herself, "jammers".

Well, we've made three jams so far, so we're getting there! They are so delicious and fresh. And it's really not that hard. Especially when Joef does most of the work. We're still experimenting a bit with consistency, probably the toughest thing to master - we've had two that are a little runnier than ideal, and one that's a little chunky, but all three have legitimately been jam. We eat it on toast, waffles, even as ice cream topping.

The three we've made to-date have been: Strawberry-Rhubarb Bourbon, Blackberry-Raspberry Petite Syrah, and Mango. The instructions are essentially the same each time:

7 lbs of your fruit of choice (we pared and halved the strawberries, and cubed and mashed the mangoes)
7 cups of sugar
2 cups booze of your choice (or, in the case of the mango, none at all)
Juice of 1-3 lemons, depending on the sweetness of the fruit and your personal taste
12 jars

Preheat the oven to 260, and wash your jars. Put the jars and the part of the lids without the rubber into the oven for the duration of the cooking.

Combine all of the ingredients into a massive pot. The liquid will obviously boil down faster if you use a wider pot with more space for evaporation. Stir and cook on very high heat until it reaches a rolling boil, then turn down the heat slightly, while still keeping it at a rolling boil, and stir constantly until it thickens and starts to appear somewhat oily and shimmery on the surface (at least 30 minutes). To test its readiness, put a small drop on a spoon and place it in the freezer for three minutes, while continuing to cook the jam. If it's the consistency you'd want your final product to be when it comes out of the freezer, it's done. Otherwise, keep on cooking and freezer-testing as needed.

When your jam is done, take the jars out of the oven, but keep the oven on. Spoon the jam into the jars, and tighten the lids. Place back into oven for twenty minutes.

Your jam is ready when the lids pop and you can't push them down again (it means they're sealed). Once you've opened a jar, store it in the fridge. Enjoy!

Wednesday, October 10, 2012

Linguine with Raw Tomato Sauce

(from Mark Bittman's How to Cook Everything)

This is a great spin on everyday tomato sauce. It's great for our new Berkeley surroundings, where we have access to super-fresh produce - in this case, particularly Berkeley Bowl heirloom tomatoes and fresh basil from the garden (although I already killed the first basil plant and am on my second; a green thumb, I don't have!). 

This basically has all the usual components of tomato-basil sauce - tomatoes, garlic, basil - you just don't cook any of it. The garlic becomes more potent, and it's wonderfully fresh and light. The pasta warms the sauce up. It reminds us of the sauce at D'Amico and Sons in Minnesota, a favorite of Joef's when he was growing up.

So, it's quick, fresh, yummy:
2 cups roughly chopped fresh tomatoes
2 tbsp olive oil
Freshly ground black pepper
Salt to taste
2 cloves garlic, lightly smashed and then chopped
1/4 - 1/2 cup fresh basil leaves, chopped
1 lb pasta
Parmesan cheese for serving

Start your water boiling and salt it. In a large bowl (with a broad, flat bottom, and ideally enough room to hold all the pasta), combine and mash the tomatoes, oil, salt/pepper, garlic, and half the basil. (I use a large, wooden muddler) Don't mash it so much that it becomes a puree - just break it down and combine the flavors a little. The sauce can sit for up to two hours like this (or you can use it right away).

After the pasta is cooked, ladle a little pasta water into the sauce to warm it up and thin it out a little. Bittman removes the garlic at this point (he just smashes it, doesn't chop it) - I think I left it in. Toss the pasta in the sauce, adjust the seasoning as needed, top with the rest of the basil, and serve with parmesan cheese.

Wednesday, September 19, 2012

Chicken with Tarragon and White Wine


(from Giada de Laurentis)

I'm between jobs right now, so I've been spending a lot of time (sigh) watching all kinds of bad daytime TV. This includes cooking shows (let's face it, though, it's usually Say Yes to the Dress and Property Brothers), which is where I found this recipe. I watched Giada make it, then gave it a stab myself. Her type of cooking is the type I can recognize and replicate without too much instruction (garlic? Got it!), so I was actually pretty happy with how it turned out, sans recipe.

That being said, I made this over a month ago, and promptly forgot how to make it. Luckily for me, the Internet is a great refresher, and I found the exact recipe (without God-knows-what modifications I made), which you can find below, with some modifications.

This was really easy and delicious, and it's nice because it seems fancy and could therefore be served to guests. Of course, Giada made some kind of appetizer and these little miniature fruit tarts...for lunch. Not going to happen, folks. So I made it for dinner, with some roasted Brussels sprouts, and called it good. And it was!

So:

1/4 cup vegetable oil (I used olive oil. I mean, come on...)
1 (4 1/2-pound) chicken, cut into 8 pieces (I used four chicken thighs)
Kosher salt and freshly ground black pepper
Flour for dusting
1 1/2 cups (about 10 ounces) cipollini onions, trimmed and peeled (grab a handful)
4 cloves garlic, halved
Kosher salt and freshly ground black pepper
1 cup white wine, such as Riesling
3 cups low-sodium chicken broth, plus 1/3 cup
1/2 cup chopped fresh tarragon leaves, plus 2 tablespoons
Heat the oil over high in a Dutch oven or large saucepan. Season the chicken with salt and pepper, dust with flour, and cook, turning occasionally to brown on all sides.

Scoot the chicken to the side and add the onions and garlic, seasoning with salt and pepper to taste, about five minutes. Increase the heat and add the wine, scraping up the brown bits that cling to the pan. Add 3 cups of the chicken broth and 1/2 cup of tarragon, and bring to a boil. Reduce the heat to low to simmer, and cover. Turn the chicken every 10 minutes or so until it's cooked through. Serve over brown rice and garnish with remaining tarragon.

Now, what the Internet version says to do is a little different, and not what I remember following from TV. It sounds good, though, so if you wanted. You'll need:
2 tablespoons all-purpose flour
2 tablespoons unsalted butter

Remove the chicken to a platter. In a small bowl, mix the remaining 1/3 cup chicken broth and flour. Whisk the flour mixture into the sauce in the pan until smooth. Bring the sauce to a simmer and cook uncovered until it thickens. Stir in the butter, and serve the sauce over the chicken.

Wednesday, September 12, 2012

Moqueca - Brazilian Fish Stew

(adapted from Saveur magazine)

While we're on the topic of shrimp (when are we not?!), here's a great and pretty easy recipe for a hearty stew that uses them, discovered in a recent issue of Saveur magazine.

The recipe was a good one, although we both agreed that we expected more flavor from the final result. So I've modified the original recipe to include some additional things (my untested additions are starred below, so you can make it as-is, or give the alternative a shot and lemme know how it goes), like cayenne and extra garlic. Maybe it's because we couldn't find palm oil and had to substitute butter. In any case, it was still pretty delicious, and a nice alternative.

1.5 lb boneless, skinless catfish filets, cut into 2" pieces
8 oz shrimp, peeled and deveined
Juice from two limes
*12 cloves garlic (recipe called for 8)
Salt and pepper to taste
3 tbsp olive oil
1 medium/large yellow onion, 3/4 minced, 1/4 thinly sliced
1 "Italian frying pepper" (if you have any idea what an Italian frying pepper is, use it; I used a jalapeno); 1/2 minced, 1/2 thinly sliced
*Cayenne pepper to taste
2 plum tomatoes, 1 minced, 1 thinly sliced
*1 cup chicken stock (recipe called for fish or vegetable)
1 cup coconut milk
2 tbsp palm oil (recommended if you can find it; I used butter)
1/4 cup minced cilantro
1/2 cup minced Thai basil leaves
Cooked brown rice, to serve

Toss the fish, shrimp, lime juice, half the garlic, and the salt and pepper in a bowl and set aside. Heat the olive oil in a Dutch oven over medium-high heat. Add the rest of the garlic, the minced onion, and the minced pepper, sprinkle with cayenne, and cook until soft. Add the minced tomatoes, and cook until broken down. Add the stock, coconut milk, and palm oil/butter, and bring to a boil. Drain the fish and add to the pot, cooking until just cooked through, about 7 minutes. Add the sliced onion, pepper, and tomato, and cook, covered, for about five more minutes. Stir in the cilantro and basil, season with salt and pepper. Serve over rice.

Thursday, August 30, 2012

The Best Shrimp Recipe Ever

 
Are you ready for this? The best shrimp recipe ever? Yes, you are. Because it is so delicious, and so easy, it will become your new go-to, and you'll make it again. At least I do.

100% credit - maybe 110%, it's that good - goes to my dad for this one (and, admittedly, for many others!). He made it for us when we were home over the summer, and oh my God. I mean, I love shrimp already, but even people (ahem, Joef) who don't go insane for shrimp (really, though? How could you not?) love this recipe.

I made it for the first time on one of the first nights in our new place, accompanied by some truly amazing steak from The Local Butcher Shop (yet another reason to love Berkeley, by the way). Unfortunately, I lost/deleted pictures of that steak (gah!). Fortunately, we made the shrimp again (as if we wouldn't!), so at least we have that going.

The secret is my dad's marinade, and cooking them up nice and quick over the grill. Oh, and leaving the skin on. You can turn it into a big meal (serve with steak and fresh salad for some surf-and-turf), medium (maybe some nice aglio e olio), or relatively light, just the shrimp and, say, a nice arugula salad with fresh cherry tomatoes, baby mozzarella, and a cherry balsamic vinaigrette. Drooling...
           

This might be one of my favorite recipes, period. I mean, I don't want to artificially raise hopes and all that, but I'm pretty confident it won't fail you.

Because it's a marinade, the recipe is rather loose. Here's what my dad said:

Olive oil, garlic, ginger, black pepper, parsley, lemon juice.

You can kind of play with the amounts of the ingredients, and my general guidance would be:

1-2 lbs shrimp, cleaned and deveined, but NOT peeled
Juice from two lemons, and some pulp (take the end of a spoon or tongs and just jam it into the lemon while squeezing)
2-4 cloves garlic, smashed a bit with the side of a knife, then roughly chopped
2-4 twists of the black pepper mill
Small bunch of parsley, chopped
Generous amount of ginger powder (yes, powder) - 5 or so shakes?
A few glugs of olive oil 
Bamboo skewers, soaked in water beforehand

You should have enough liquid to coat the shrimp, and some will pool in the bottom of the bowl as well. You combine all of these ingredients in a bowl, stir them up to coat the shrimp, then pop them in the fridge for about 3 hours. Skewer them, making sure the skewer pierces the shrimp in two places, and that all tails are facing the same direction.

Shrimp cook really fast, so just cook them a couple/few minutes on each side on the grill, so that they get nice and pink. Eat outside with a nice white wine, and it will be a wonderful evening.

Tuesday, August 28, 2012

Soft-Boiled Egg Sandwiches

This is one of the first breakfasts we made in our new place. We had fresh heirloom tomatoes (those yellow bits) from the Farmers Market, Joef hadn't started work yet, and this was just the perfect lazy morning meal.

There's a place in Boston called Clover Food Lab where we first had breakfast sandwiches like these, with pita and soft-boiled eggs. I don't know what they did to those things, but they were crazy delicious. And these were, too.
 
I had to learn how to make a soft-boiled egg. Thanks, Internet!: http://www.wikihow.com/Make-a-Soft-Boiled-Egg. If you feel like yours end up too runny after following these instructions, you can pop them in the microwave for like, 10-20 seconds.

All you need is:
Eggs, poached (see link above)
Pita bread
Cheddar cheese, sliced
Tomato, sliced

Assemble! I'd recommend putting everything together, apart from the egg, first. Then you can pop the warm egg right in there and start melting the cheese a bit. Mmmm!