Showing posts with label lunch. Show all posts

Wednesday, October 10, 2012

Linguine with Raw Tomato Sauce

(from Mark Bittman's How to Cook Everything)

This is a great spin on everyday tomato sauce. It's great for our new Berkeley surroundings, where we have access to super-fresh produce - in this case, particularly Berkeley Bowl heirloom tomatoes and fresh basil from the garden (although I already killed the first basil plant and am on my second; a green thumb, I don't have!). 

This basically has all the usual components of tomato-basil sauce - tomatoes, garlic, basil - you just don't cook any of it. The garlic becomes more potent, and it's wonderfully fresh and light. The pasta warms the sauce up. It reminds us of the sauce at D'Amico and Sons in Minnesota, a favorite of Joef's when he was growing up.

So, it's quick, fresh, yummy:
2 cups roughly chopped fresh tomatoes
2 tbsp olive oil
Freshly ground black pepper
Salt to taste
2 cloves garlic, lightly smashed and then chopped
1/4 - 1/2 cup fresh basil leaves, chopped
1 lb pasta
Parmesan cheese for serving

Start your water boiling and salt it. In a large bowl (with a broad, flat bottom, and ideally enough room to hold all the pasta), combine and mash the tomatoes, oil, salt/pepper, garlic, and half the basil. (I use a large, wooden muddler) Don't mash it so much that it becomes a puree - just break it down and combine the flavors a little. The sauce can sit for up to two hours like this (or you can use it right away).

After the pasta is cooked, ladle a little pasta water into the sauce to warm it up and thin it out a little. Bittman removes the garlic at this point (he just smashes it, doesn't chop it) - I think I left it in. Toss the pasta in the sauce, adjust the seasoning as needed, top with the rest of the basil, and serve with parmesan cheese.

Monday, August 13, 2012

La Piccina Cucina: Camping Edition #2

Every two years or so, Joef and I grab a few innocent and unsuspecting souls and drag them out to the Boundary Waters between Minnesota and Canada. This summer was my third trip and Joef's fifth, and it did not disappoint. It's some of the most beautiful, pristine wilderness I've ever seen, and I'll go back again and again. I mean, what's not to love about canoeing 20 miles a day with portages in between?

Last trip out, I posted about our handpicked blueberry compote. We were a little too early in the season this year for berries, but we did make a point of getting creative with cooking this time around. 

There was the usual fresh-caught fish (bass), fried:

But we also got experimental, with things like modified hummus (chickpeas, garlic, olive oil, sesame seeds, lemon, salt, and zatar are all easy to pack): 
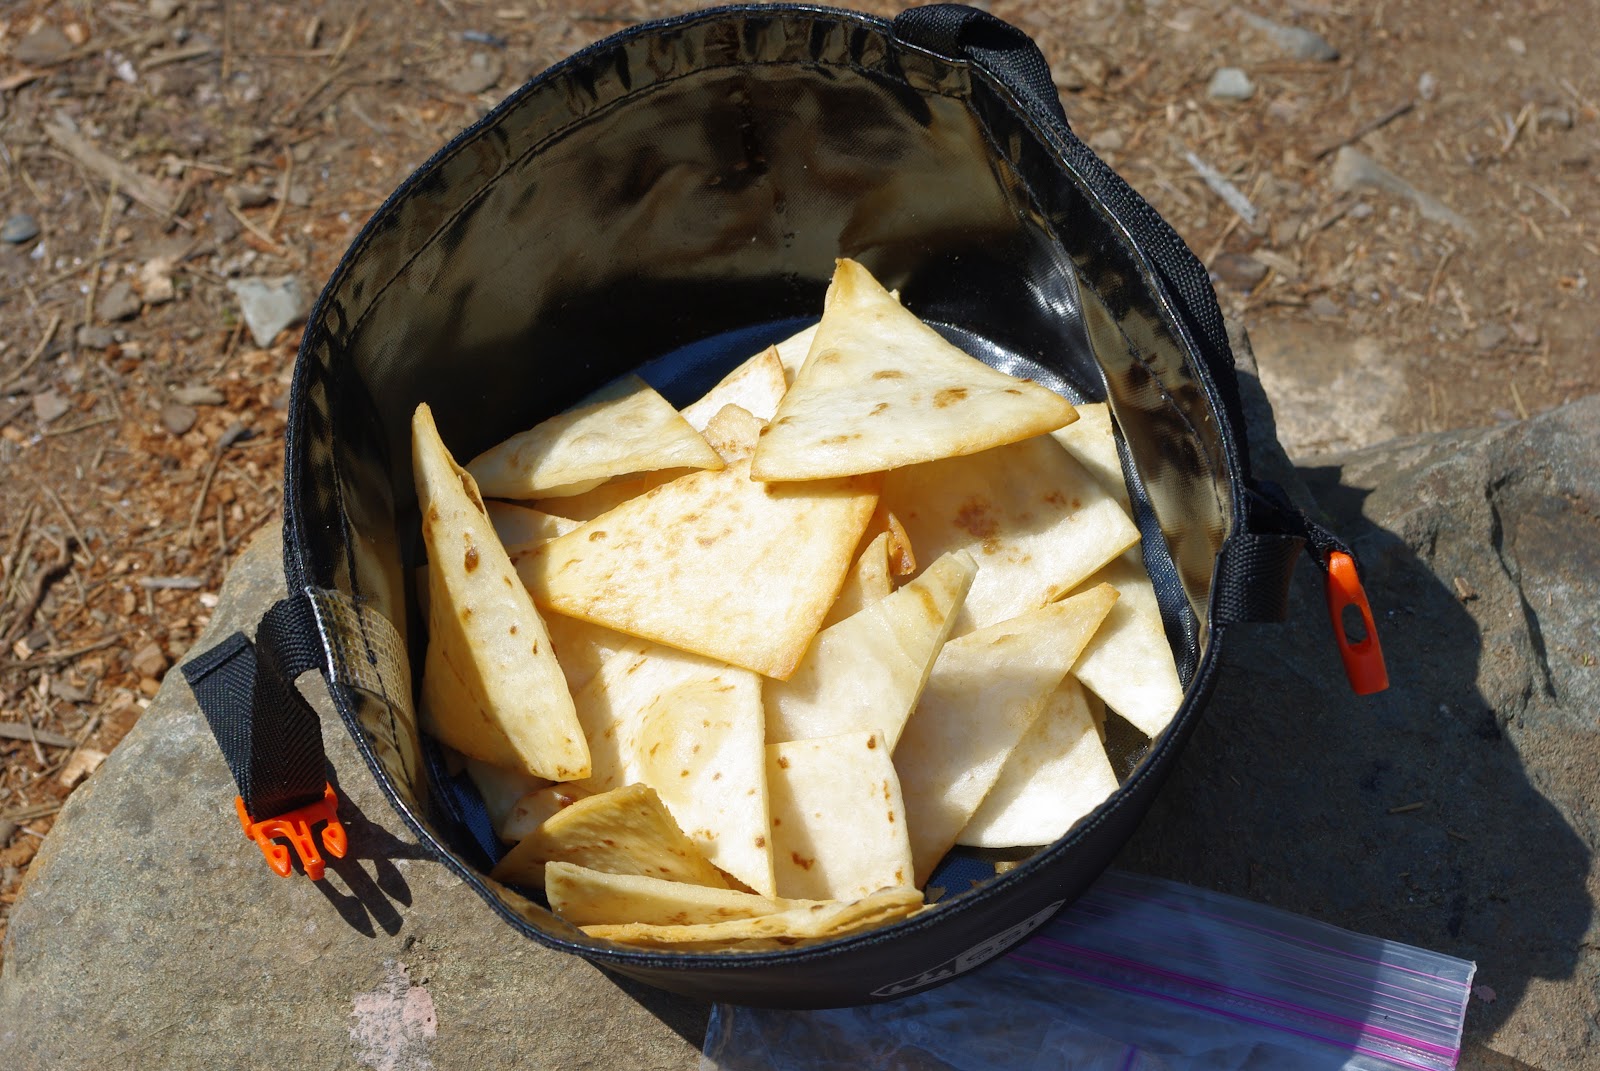
Enjoy them with tortilla chips (cut tortillas into triangles and fry them up):
And we even made pasta, with pesto (paste) and sundried tomatoes:
The coup de grĂ¢ce was cake baked in an orange peel. Now, it should be noted that the final outcome, taste-wise, could probably, er, be improved upon. But the concept is sound! Next time, we'd only fill the oranges halfway, and would either put them on top of the grill, or further from the fire. There was a bit of an ashtray effect. But we MADE CAKE IN THE WILDERNESS! With sparkly frosting!
Choose a batter that doesn't require eggs. Slice just the top off an orange, and scoop out the insides. Mix your batter, and spoon it into the orange.
Secure the top of the orange with toothpicks.
Place the batter-filled orange(s) near the fire. Rotate now and then to heat all sides. Cook for...um...20 minutes? Eyeball it.
Remove the oranges from the fire. Allow to cool, then remove the tops.
Spoon out the cake and dab with frosting!

It was an amazing trip with amazing people. Plus, no injuries! Here we are, just after getting off the water:


Wednesday, August 8, 2012

Bake Sale Betty's Fried Chicken Sandwiches with Jalapeno Slaw, and, Welcome to California!

(adapted from www.food.com) 

Phew, talk about a hiatus! We're back, folks! To remind myself how long it's been since I've posted, and therefore, how long it's been since I've cooked anything (new, at least, but pretty much just anything), this recipe is from MAY. Specifically, from Joef's graduation from the Yale School of Management (watch me burst with pride!). Since then, we've moved out of New Haven, CT, driven to Pittsburgh, Chicago, Madison, and Minneapolis; camped in the Boundary Waters; driven back to Chicago and St. Louis; flown to San Francisco; driven back to Minneapolis, back to St. Louis; and then driven all the way from St. Louis to Berkeley, CA, where we now reside (hooray!).

This first-recipe-back is appropriate, then - Joef requested it for his graduation because he'd gotten to know and love Bakesale Betty's, an Oakland favorite, during his internship last summer. And now, internship has turned into full-time position, and here we are, living in the East Bay. And I'm finally posting this recipe. It's like a welcome to the neighborhood. And WOW, is it beautiful here. The local grocery store has more (low-price!) fruits and vegetables than I could count, about half of which I've never even heard of before. But I digress...

What really makes these sandwiches (besides the delicious, delicious grease!) is the jalapeno coleslaw. That's right. It's wonderfully tangy and hot, and cuts the grease of the fried chicken just right. I borrowed the recipe from Food.com, and it was a crowd pleaser.

By the way, this makes a TON of coleslaw. Way more than you need. So you could halve that portion of the recipe, if you so chose.

CHICKEN
4 boneless skinless chicken breasts (or however many sandwiches you want to serve - my memory is failing me, but I may have fileted the breasts in half, but that's up to you)
Salt
1 quart buttermilk

VINAIGRETTE
1 tbsp Dijon mustard
3 tbsp red wine vinegar
1 tsp kosher salt
 1/2 cup extra virgin olive oil

SLAW
1 small red onion, very thinly sliced
1 cup red wine vinegar
2-4 jalapenos, seeded, cut in half and sliced crosswise
1/4 cup parsley, chopped
1/2 green cabbage, core and outer leaves removed, and very thinly sliced
Salt

BREADING
1 lb all-purpose flour
1 tablespoon cayenne pepper
1 tablespoon salt (or more to taste)
1 1/2 teaspoons fresh ground pepper

AND
2 quarts vegetable oil for frying
4 rolls (or however many sandwiches you want to make)
Season chicken breasts with salt. Let sit at least 5 minutes. Fill a wide, shallow nonreactive bowl or casserole dish with buttermilk. Add the chicken and soak in the refrigerator for 1 hour. 
In the meantime, start on the vinaigrette: combine mustard, vinegar and salt in a bowl. Slowly whisk in olive oil until well blended.
Then, start on the slaw. Macerate onions in the cup of red wine vinegar, and let sit at least 20 minutes. (I had to look up what "macerate" means. It's the process of softening something by soaking it in liquid.) Remove onions and discard vinegar. Toss onions with jalapeno, parsley, cabbage and salt. Toss with vinaigrette until evenly coated. 
Ready to fry the chicken? Prep the breading by mixing flour, cayenne, salt and pepper in a wide, shallow bowl. Pour vegetable oil into a large stockpot. Do not fill up more than halfway, or the oil could splatter. Bring oil up to 365°, using a digital thermometer/candy thermometer to monitor the heat. Pull a chicken breast out of the buttermilk one at a time, letting excess drip off, and dredge completely in flour. Do not drain or shake off excess buttermilk or flour during the breading process. That's the yummy part!
When the oil is at 365°, carefully place chicken pieces into oil one by one. Let each cook for a minute before moving the piece, then help it “swim” in the oil with tongs, until it is evenly cooked, about 5-7 minutes. Remove chicken from oil and drain on paper towels. Season immediately with salt.
To pull it all together, place fried chicken breast on bottom of torpedo roll and top generously with coleslaw. DEVOUR!

Tuesday, February 7, 2012

Peas, Mushrooms, and Prosciutto Sauce with Cream

(adapted from Marcella Hazan's Essentials of Classic Italian Cooking)

Hooray! Italian food! Pasta! Carbohydrates! Honestly, I love all kinds of food, but if I've gone too long without pasta, things get ugly. I just need it. It's my core diet.

I had never tried making a cream sauce before (well, I did a makeshift - but yummy - alfredo or two in college). I had a sense of what I wanted to do, and I read Marcella's recipe for "Peas, Peppers, and Prosciutto Sauce with Cream" to get a sense of the basics and then improvised. While I'm sure I didn't improve on Marcella (is such a thing possible?), this was really delicious. Great for a chilly winter evening, when you need a little fattening up.

This is fast, so you can start the water boiling while you prep the ingredients.

1/2 package mushrooms, sliced and maybe halved
2-3 tbsp butter
4-6 thin slices prosciutto, torn into strips
1 cup small frozen peas, thawed
1 cup light cream ("healthy"!)
Salt
Freshly-ground black pepper
Pinch ground nutmeg
1/2 - 3/4 cup grated parmesan cheese
3/4-1lb pasta

Start by sauteeing the mushrooms in the butter over medium heat with a little salt and ground pepper. When they've softened, add the prosciutto and cook for about a minute. Stir in the peas, cooking for another minute.

Add the cream, along with salt to taste an another grinding of pepper, plus your pinch of nutmeg. Cook, stirring constantly, until the cream thickens.

Toss the sauce with your pasta and add the parmesan and stir. Serve and devour!

Sunday, November 20, 2011

Pasta with Eggplant and Ricotta, Sicilian-Style

(adapted from Marcella Hazan's Essentials of Classic Italian Cooking)

I've raved about Marcella before, but man. She just never fails. I could randomly point to a recipe in her book, and it would be amazing. If I could have only one cookbook for the rest of my life, it'd be this one.

I obviously have a pasta bias, and this recipe was great, because it was a little different from the usual pastas I make. More steps than the usual pasta, too - but worth it.

Usually I follow Marcella's recipes to the letter, but I accidentally bought too little eggplant (one instead of two - although one ended up fine), and didn't have any romano cheese (substitute parmesan). I did, however, actually peel the tomatoes and remove the seeds, steps I usually would have skipped. Worth it!

1-2 Italian eggplants (preparation required)
Salt
Vegetable oil
1/3 cup olive oil
1/2 onion, sliced very thin
1-2 cloves garlic, chopped
5 Italian plum tomatoes, skinned with a peeler, split lengthwise to pick out the seeds, and cut into narrow strips
Freshly ground black pepper
3 tbsp grated romano cheese (alt: parmesan)
3 tbsp skim ricotta (mmm, I am newly a big fan of ricotta)
8-10 fresh basil leaves
3/4 lb pasta
Grated parmesan for serving

Start by prepping the eggplant. Cut off the spiky cap. Peel the eggplant and cut into 1.5-inch cubes. Place the cubes in a colander and set over a paper towel, then sprinkle cubes liberally with salt. Let the eggplant sit for at least a 1/2 hour and up to 1 hour. This draws out the bitterness of the eggplant.

Rinse the eggplant cubes in cold water, then dry them in a paper towel in batches - you can put them in the paper towel and squeeze them gently, almost like you're wringing them out. Set aside once you've rinsed all of them.

Put enough vegetable oil in a large frying pan to come up about 1/2 an inch on the sides of the pan. Turn the heat to medium-high. Once the oil is very hot, slip in the eggplant pieces and fry them until the pieces feel tender when prodded with a fork. Transfer with a slotted spatula to a plate lined with a paper towel.

Pour the oil out of the frying pan and wipe clean with paper towels. Add the olive oil and sliced onion, and turn the heat to medium-high. Saute the onion until it turns light gold in color and begins to caramelize, then add the chopped garlic and cook for just a few seconds, stirring.

Add the tomato, turn the heat to high, and cook for 8-10 minutes, stirring, until the oil floats free from the tomato (this will make sense when you see it).

Add the eggplant and a few grindings of pepper, stir, and turn the heat down to medium. Cook for just a minute or so more, stirring a couple times. Taste and add salt if needed.

Toss the cooked and drained pasta with the sauce, add the romano/parmesan, the ricotta, and the basil leaves. Toss again to coat the pasta, and serve with grated parmesan.

Monday, August 22, 2011

Tortellini with Sage Brown Butter

(from Mario Batali)

Mario Batali, you officially have a new fan. I mean, I have been dying to go to Eataly. Other than that, I wasn't entirely sold (this opinion was clearly based on zero evidence). But then there was the papalina recipe. And now, this. And now, I'm completely won over. I want to go buy all the cookbooks you've ever written, Batali.

I've always wanted to make a sage brown butter sauce. I've tried. But something wasn't right - the recipe sounded way too heavy on the butter (it is butter sauce, I suppose), or I burned the butter, or there wasn't enough sauce. But I did a quick Google search tonight, Batali's was the first one, and what I saw finally looked right.

The secret ingredient was lemon juice. Something to cut the butter. Something to give it a little zip and make it into a real sauce. The addition of parmesan didn't hurt, either.

This is so, so easy. And so, so good. Just...satisfying. Subtle yet powerful at the same time. And for a butter sauce, it doesn't feel overly buttery or heavy, either. It takes as long to make as it takes to cook pasta. Are you sold yet?

8 oz dried tortellini
2 tbsp butter
4 sage leaves
Juice from about 1/4-1/3 of a lemon
1/4 or so grated parmesan (I used a tad less)

While the pasta cooks, melt the butter in a saute pan, and cook over medium heat until the thinnest liquid of the butter starts to get golden brown. Add the sage leaves and remove from heat, then squeeze the lemon juice directly into the pan. Set aside.

Drain your pasta, reserving just a bit (less than a 1/4 cup) of pasta water. Pour pasta into the saute pan with a little pasta water and return to heat. Toss to coat, add the cheese, and toss to coat again. Heaven!

Tuesday, August 2, 2011

Pasta alla Gricia

So, there are a few basic Roman dishes that are all fairly simple variations on one another. There's all'amatriciana (tomato, onion, pancetta), carbonara (romano/parmesan cheese, egg, pancetta), cacio e pepe (romano cheese and black pepper), arrabbiata (tomatoes, chili, pancetta), alla papalina (romano cheese, black pepper, prosciutto, eggs...omg, why have I not made that yet?), alfredo (parmesan and butter)...and alla gricia, which is just romano, black pepper, and pancetta.

Now, while these seem like pretty simple concepts, and they are, there is a fair amount of hullaballoo over how to make them. It's mostly a traditionalist argument around what P.G. Wodehouse might refer to as "the purity of the turf". Add onion or shallots to carbonara? To amatriciana? Sacrilege! See? It's very serious.

I'm very much about food tradition and all, but there are certain realities of my kitchen, and a certain laxity in my spirit, I suppose, that leads me off the beaten path from time to time. In this case, I made pasta alla gricia with rigatoni instead of spaghetti (spaghetti would have been better, admittedly), and I used...sigh...a Kraft parmesan-romano grated cheese blend (it's real cheese, though - no fillers!) instead of a pecorino romano, which also probably would've been better. Some argue for guianciale over pancetta; I used pancetta. Other than that, I stuck to the purist guns. As far as I know, at least.

This cooks up fast, too!

3/4 lb pasta
2 tbsp olive oil
2 thickish slices pancetta, diced
1/2 cup grated Romano cheese
1 cup reserved pasta water
Plenty of ground black pepper

Get your water boiling. In a pan, combine your olive oil and pancetta over medium, and cook until slightly browned. Set aside/remove from heat. 

Meanwhile, cook your pasta, setting aside the cup of pasta water. Drain pasta and add directly to the pan with the pancetta, tossing to coat. Add the cheese and toss to coat again. If it's dry, add pasta water. Add plenty of black pepper, tossed in, and serve with more grated cheese.

Tuesday, July 26, 2011

Pasta Salad with Salmon

My folks, aunt, and uncle were in town this past weekend, and thanks to that, I re-discovered one of my favorite summer recipes of my mom's. It's very similar to Salmon Salad, except that it omits the beans and adds pasta (which I'm always in favor of, obviously - nothing against beans, but pasta is my...um...bread and butter?).

This is seriously so good - the perfect summer recipe, because the only stove time is to boil some water for the pasta, beans, and eggs (which you can do in the same pot, if you're clever like my Ma). This recipe has changed over the years - we used to not use avocado or arugula; used lettuce, used peas, used tuna...you can really make it however you like. It's light, delicious, and relatively healthy. We top it (surprise!) with grated parmesan cheese, which really puts it over the edge.

Serves 5.

3/4 lb baby shells (bowtie pasta is really good for this, too)
Handful and a half or so green beans, cleaned and rinsed
3 eggs
10-15 baby carrots, sliced thin
1 avocado, peeled and cubed
1 container grape tomatoes, halved
2 cans or packages salmon
A few handfuls of arugula
Olive oil
White balsamic vinegar (lighter in flavor than regular balsamic; alternately, you can use fresh lemon juice)
Ground black pepper
Grated parmesan cheese, for serving

Place three eggs into the pot you'll use to cook the pasta in and add water for cooking the pasta. Bring to a boil, then add the pasta and the green beans.

Meanwhile, in a very large salad bowl, combine carrots, avocado, and grape tomatoes. Add the salmon and mix together.

When the pasta is ready, remove from heat. Drain the pasta and green beans and rinse with cold water. Remove the eggs and place in a bowl of cold water to cool. When the eggs have cooled, peel them, remove the yolks (unless you don't want to), and cube the egg whites into the salad bowl. Add the pasta and green beans.

Next, dress the salad. Oy, I wish I had actual measurements here for ya. You will use more olive oil than you probably would think - the ingredients soak it up well. Use the olive oil and balsamic in approximately a 2:1 ratio of oil to vinegar. I just watched my dad pour on the olive oil - I want to say it was at least 1/4 cup. Add olive oil, then balsamic, then toss to coat. Taste and adjust as needed.

Finally, add the arugula, along with just a splash more olive oil and vinegar. Grate in a little black pepper to taste. Toss to combine and serve!

Tuesday, July 19, 2011

Arugula Pesto


I'd like to say that this is a recipe that I've been dying to try for months, and the truth is that it's more like I've been avoiding making it. I want to say I saw it at least a year ago in a Mark Bittman article, where he explained that "pesto" needn't apply only to basil, but that it could be make with many other things, including asparagus and arugula.

Now, I love arugula. I love pesto. But I really, really, REALLY love pesto made with basil (no pine nuts, please!). So the thing is, it's hard to break away. It's hard to make the decision to make pesto, and then make it with something other than basil. Plus, I was skeptical about the bitterness of the arugula. Hence, arugula pesto went unmade.

But I got back from Wisconsin (so wonderful - friends, a wedding for a wonderful couple, and meals at both Osteria Papavero and Pizza Brutta) the other night and had a whole mess of arugula in the fridge that needed eatin'. And, it being summer and all, I decided to go for it.

I'm really glad I did. Yes, it's bitter. Yes, I used waaaaay to much garlic, and it was...powerful. And I really liked it. Basil remains my favorite, but that wasn't going to change. Aside from using it in pasta, I could see using it as a sandwich spread, maybe even on pizza. I saw one recipe where the cook added chickpeas to the pesto, ground up with the arugula. So yes, I'd definitely make it again.

For one, with lunch leftovers:
1/2 lb pasta
1/4 cup olive oil
1 large clove garlic (I used two HUGE cloves...too much)
3 handfuls arugula
1/3 cup parmesan cheese, grated, plus more for serving
Salt to taste

Start your pasta cooking. In the meantime, combine the arugula, garlic, and olive oil in a food processor or blender. Blend into a pasta, scraping down the sides as needed. Pour into a small bowl and add the parmesan, and stir to combine.

When the pasta is ready and drained, stir in the pesto until the pasta is coated. Add salt, if you'd like, and serve with grated parmesan (or Romano!) cheese.

Monday, June 13, 2011

Creamy Polenta with Gorgonzola

(adapted from Marcella Hazan's Essentials of Classic Italian Cooking) 

I love polenta. Joef hates it. I honestly cannot understand this, but that doesn't make it any less true. So, while Joef's away, expect to see me indulge in recipes with his least favorite ingredients - polenta, lentils, gnocchi (I know, he's crazy), etc. Fortunately, it's not really a long list, but I can indulge nonetheless.

This isn't so much a recipe as a suggestion from Marcella. She casually mentions how hot, soft polenta is great with some gorgonzola, butter, and parmesan cheese melted into it. Of course it is.

I didn't have any parmesan, but this was still delicious. Very comforting. It came out a little like grits, actually. Very creamy, very soft. What surprised me is that the texture of the polenta actually got a lot lighter with the cheese added - I expected it to get heavy. Not to say that this isn't filling, but it had a fluffy consistency.

Also, it takes like five minutes to make, so what do you have to lose?

1 cup instant polenta
1/4-1/2 tbsp butter
0.4 lbs (or so) gorgonzola crumbles

Make the instant polenta according to the package instructions. When cooked, remove from heat and immediately add the butter. Add gorgonzola crumbles in batches, gradually, stirring after each addition until melted and mixed in before adding the next batch. Taste periodically until it has the flavor you want. Sprinkle a couple gorgonzola bits on top for style, and cozy up with some nice hot, melty food on a blazingly hot day!

Sunday, March 13, 2011

Cheesy Scrambled Eggs with Veggies and Toast

I'm a big fan of eggs for lunch. Combine that with an urge to be better at eating vegetables, and an insatiable hunger after a (lousy) 10.5 mile run, and you have this meal. If you can, get the toast crispy enough so you can eat it like an open-faced sandwich (which I suppose it is), without a fork.

1/2 a bunch or so asparagus, quartered
A little white onion, chopped
Olive oil
3 eggs, beaten with dill
1/2 a small tomato, chopped and salted
Shredded cheese, to taste

Saute the asparagus and onion in olive oil over medium/medium-high until both have softened. Pour beaten egg into pan and slowly shift the mixture around, letting the egg turn and cook on all sides. Pour in the tomatoes, and mix them in in the same fashion. Near the end, add the cheese and stir gently to incorporate as it melts. Serve over toast.

Polenta with Sauteed Mushrooms and Rabe

If I make polenta, it means Joef isn't around. He is not a fan. I wish he were around - he is still in Japan - safe, and on his way back home, but still in Japan. I can't imagine the devastation and loss the people of Japan are suffering.

For now, I'll focus on lighter things. This is an incredibly quick and easy meal. The recipe is a little rough, as I improvised as I went along, and fortunately, it's the type of recipe that allows you to be a little inexact. If I'd had wine, I probably would've added it. Chicken broth did just fine. Go ahead and use instant polenta - it's just about as good as the real thing, and definitely worth the corner-cutting.

Half-package sliced mushrooms, rinsed
A few stalks or more broccoli rabe
2-3 cloves garlic, chopped
Olive oil
1/2 cup chicken broth
1 cup instant polenta (you'll have leftovers, which you can saute and eat for breakfast!)

Saute garlic, mushrooms, and rabe in olive oil until the mushrooms start to soften and darken. Add the chicken broth and cook over medium-high, allowing some of the broth to absorb/cook off. When it's at the liquid level you want and the mushrooms are cooked, pour over your instant polenta. Add a drizzle of olive oil, if you wish, and serve with parmesan cheese

Friday, February 11, 2011

Super Bowl Chicken Wings - GO PACK GO!


As seems to be the trend with my posts this year, I'm once again a few recipes behind. I made these wings for our Super Bowl party last Sunday (SO excited that the Packers won!), because what else are you supposed to eat watching Aaron Rodgers decimate Ben Roesthlisberger? There were three versions, as you'll see - Medium (sweet 'n spicy), Hot (buffalo style), and "Fun" (Joef). Fun, as you can probably guess from Joef's particular sense of taste, is in this case relative - his wings, as you'll see, contain three tablespoons - yes, tablespoons, of Naga Jolokia powder. I have to commend both him and our guests - those babies got eaten up just about as quickly as the other, milder versions.

Plus, two of these recipes don't even require deep-frying - they're oven-baked! Mmm, healthy!

MEDIUM - Sweet 'n Spicy
from saveur.com
4 lbs chicken wings, kept whole or divided
Dry Rub
-2 tbsp Smoked Paprika
-4 tsp onion powder
-4 tsp coriander
-1 tsp garlic powder
-1/2 tsp cayenne pepper
-1 tsp crushed red pepper
-2 tsp brown sugar
-Salt
-Fresh-ground black pepper
Sauce
-1 cup Frank's RedHot Original Cayenne Pepper Sauce
-1 cup good quality barbecue sauce (I used Jack Daniels Hickory Maple or something like that)

Combine the dry rub spices in a large bowl, adding salt and fresh-ground black pepper to taste. Toss the wings in the spice mixture (we used gallon ziploc bags), and let wings sit at room temperature for 30 minutes.

Arrange wings on wire racks set over sheet trays. Place the wings in a cold oven and set for 275. Cook for 30 minutes.

Raise oven temperature to 475. Continue to cook wings until golden brown and crispy, about 30-45 minutes more, rotating the trays and flipping the wings halfway through the cooking. If the wings are not crispy after 45 minutes, run them under the broiler until crispiness is achieved. (Ours were crispy by that time.) After the wings are crispy, let them cool slightly.

Mix hot sauce and barbecue sauce together. Add the wings and toss to coat.

HOT - Buffalo (aka omg, I can't believe all this butter)
from saveur.com
Canola oil, for frying
4 lbs. chicken wings, separated into 2 pieces
16 tbsp. unsalted butter (2 sticks)
2 12-oz. bottle Frank's RedHot Original Cayenne Pepper Sauce
Heat oven to 200. Pour oil into a 6-qt. Dutch oven to a depth of 2" and heat over medium-high heat until a deep-fry thermometer registers 400. Working in two batches, add chicken wings to oil and cook, stirring occasionally, until golden brown and crisp, 10–12 minutes. Stand back! It will get crispy - just wait for it. Using a slotted spoon, transfer wings to a wire rack set over a rimmed baking sheet and transfer to oven.

Meanwhile, melt the butter and stir into the hot sauce. Pour over chicken wings and combine.

"FUN" - Joef
4 lbs chicken wings, kept whole or divided
Dry Rub
-2 tbsp Naga Jolokia pepper
-4 tsp onion powder
-4 tsp coriander
-1 tsp garlic powder
-1/2 tsp cayenne pepper
-1 tsp crushed red pepper
-2 tsp brown sugar
-Salt
-Fresh-ground black pepper
Sauce
-1 cup Frank's RedHot Original Cayenne Pepper Sauce
-1 cup good quality barbecue sauce (I used Jack Daniels Hickory Maple or something like that)
-2 tbsp habanero flakes
-1 tbsp Naga Jolokia

Combine the dry rub spices in a large bowl, adding salt and fresh-ground black pepper to taste. Toss the wings in the spice mixture (we used gallon ziploc bags), and let wings sit at room temperature for 30 minutes.

Arrange wings on wire racks set over sheet trays. Place the wings in a cold oven and set for 275. Cook for 30 minutes.

Raise oven temperature to 475. Continue to cook wings until golden brown and crispy, about 30-45 minutes more, rotating the trays and flipping the wings halfway through the cooking. If the wings are not crispy after 45 minutes, run them under the broiler until crispiness is achieved. (Ours were crispy by that time.) After the wings are crispy, let them cool slightly.

Mix hot sauce, barbecue sauce, and spices together. Add the wings and toss to coat.

Sunday, November 28, 2010

Spinach Pie


Spinach pie is really one of my favorite pies. I've always been a savory-vs.-sweet kind of gal, and this just hits the spot - it's even good, if not better, cold the next day. This pie was my (small) contribution to the Thanksgiving feast this year. We did Thanksgiving with family in New York this year, thanks to Kaylynn and Alexis, and it was a blast. The food - none of which I can take any credit for, aside from this pie - was out of this world. We even had oysters. Oysters!

The pie seemed to go over well, and was enhanced by the fact that it was a collaboration between myself and Joef's Aunt Sylvia, who made a delicious gluten-free crust for my filling. I need to get that recipe from her - for now, I've posted the usual and always satisfying crust recipe, and will update with the gluten-free version when I have it.

Happy Thanksgiving!

1 lb frozen chopped spinach, defrosted and drained
1/2 lb muenster cheese, grated
1/2 cup granted parmesan
Sprinkle of nutmeg
1 egg
1 onion, diced
2 medium-sized potatoes, boiled
Milk
Butter
Salt and pepper
Olive oil
Pie crust (below; gluten-free recipe to follow)

Put some olive oil in a large frying/saute pan and heat over medium. Add onions and allow to begin to soften, then add spinach. Stir around and let the spinach get hot and the onions soften. Add a little butter - 1-2 tbsp - and melt that in. Season with salt and pepper to taste.

Meanwhile, break your egg into a large mixing bowl, beat it, then add your two cheeses and stir. Sprinkle in a little nutmeg (remember a little goes a long way). When your potatoes have boiled, mash them up with a little milk and butter, then combine in the large mixing bowl with the egg and cheese.

When you feel the spinach is cooked, remove it from the heat and let it cool a little bit so it doesn't cook the egg. Then mix it in with ingredients in the mixing bowl. Stir well, adding a little milk if you feel that it's dry. Pour it into the crust (see below).

CRUST (with gluten)
1 1/2 cups flour
1 stick butter, cut roughly into tablespoons
1/4 cup cold water

Preheat oven to 375. Combine the flour and butter in a bowl, and mix with your hands until fluffy and combined. Add the cold water, and again mix with your hands until you have dough that you can roll out. Add flour if it's getting too sticky. Place floured wax paper on your counter and roll out the dough on the paper (lightly flour the rolling pin, too) until it's about the thickness you want for your crust. Lift the dough over your pie tin, press down into the tin, and trim the edges (save them). Patch as necessary, then pour in the filling.

Take the remaining dough and roll it out again. Crust should cover the top of the pie. Use your fingers and thumb to pinch together the edges of the pie to get that ripply effect, and pierce top with tines of a fork.

Bake until crust is golden-brown.

Wednesday, October 13, 2010

Tuna Fish Spaghetti


Well no, it wasn't with spaghetti tonight - "Tuna Fish Spaghetti" is just what we called it when my dad made it (or something similar) at home. And yes, this is akin to another recipe you've seen before. But this version omits the green olives and adds a little more tomato. There's nothing wrong with variations on a theme, folks, especially on a weeknight!

So here's this version, for the olive-averse:
2-3 cloves garlic, chopped
1 tbsp olive oil
Fresh parsley, chopped
2 Roma tomatoes, chopped and lightly salted
Red pepper flakes to taste
1-2 cans tuna fish in olive oil
1 can tomato sauce
1 lb pasta

Get your water boiling so that you can cook your pasta while you make the sauce.

Put the garlic, olive oil, and olive oil from your can of tuna in a pan and heat over medium-high. After a minute or so, add your tomatoes and parsley along with the chili flakes to taste. Let that cook for a couple minutes more, turn the heat to medium, and add the tuna, crushing the tuna into smaller chunks with a wooden spoon. Let the flavors cook together for a couple more minutes, then stir in your tomato sauce. Bring the sauce to a boil, then turn down to low and allow to simmer. Add more flakes if you want 'em. Cook for about 10-15 more minutes. If you time it right, your pasta will be done cooking right around the time the sauce is ready (although you can always cook the sauce a little longer if you want a deeper flavor - just keep the sauce on low and partially covered to make sure it doesn't dry out.) Add the pasta right to the sauce, toss, and serve.

Friday, October 1, 2010

Penne with Zucchini and Tomato


This is one of those, "How can I use these veggies before they go bad?" type of dishes, which generally, in my experience, can have mixed results. This, however, turned out pretty darn good for a quick lunch. Make sure to top it with plenty of parmesan cheese. Recipe is for one.

1/3 lb pasta
Olive oil
3 cloves garlic, chopped
1 zucchini, quartered then sliced
1 large Roma tomato, chopped and lightly salted
Sprinkle dried basil
Salt to taste
Parmesan cheese for serving

Cook your pasta. Meanwhile, drizzle olive oil in a saute pan, add garlic, and cook over medium-high heat until garlic is sizzling (don't let it brown/burn). Add the tomatoes and the zucchini, and mix in. Sprinkle with a little dried basil. Turn the heat down to low-medium and cover or partially cover. Cook until the zucchini has softened.

Drain your pasta and add it to the sauce, cooking and stirring over low until the pasta is covered. Serve with parmesan.

Sunday, September 19, 2010

Goat Cheese, Tomato, and Caramelized Onion Omelette


Here we go, another "recipe" whose name pretty much sums things up. But I've never actually successfully made an omelette, so this was an accomplishment for me. Plus, say you have leftover goat cheese from a certain salad, and leftover tomatoes from a certain fish dish...well, there you go.

3 eggs, beaten
Butter
1/4 cup (ish) cherry tomatoes, halved
1/4 cup (ish) white onion, sliced or chopped
A few sprigs arugula
As much goat cheese, crumbled, as you want

First, caramelize the onions: take a frying pan and grease the bottom with butter, then add the onions and cook them on medium until they begin to soften and brown. Put them aside.

Second, do the same with the tomatoes (will take less time).

Butter the pan again and pour in the egg (turn up the heat a tad). Lift the pan and shift the eggs until the bottom of the pan is covered; you can lift up the sides a bit and let the egg run under itself a little, too. Cook until the top is nearly not runny, then add the onion, tomatoes, arugula, and cheese to one side. Fold the other side over the filling, then flip. Repeat the flip until the cheese is melty and all the egg is cooked. You could even serve it with a little arugula salad on the side.

Thursday, August 26, 2010

Toasted Vegetable Frittata


I've been wanting to make a frittata for awhile, and lunch today was a great opportunity. Cooking for lunch feels like such a novelty. This was fun and really could take on tons of alterations - different cheeses, different veggies, different herbs, etc. Had it with a little arugula/balsamic/olive oil salad on the side. Here's what I used for one (and half of it filled me up):

4 eggs
Salt
Pepper
A pinch of dill
A pinch of paprika
A splash of half-and-half
Half an orange bell pepper, halved again and sliced
1/4 a white onion, halved and sliced thinly
1-2 tbsp olive oil
A few leaves of arugula
A few thin slices of cheddar cheese
Parmesan cheese

Combine the eggs, a little salt, a little pepper, your pinches of dill and paprika, and a splash of half-and-half in a bowl and whisk together, then set aside. Put a small frying pan over medium-low heat and place a square of aluminum foil in the plan, then put your onions and bell pepper on top of the foil and sprinkle with salt and ground pepper. Cook, stirring occasionally, until they start to get brown around the edges. Then, in another larger (but not too large) frying pan, drizzle just a little olive oil and add the onions and pepper to that, over medium-high heat. Stir it around once or twice and add your egg mixture evenly around the pan. Place your arugula on top of the egg mixture in the pan, then arrange the cheddar slices evenly on top of that.

Watch for the edges of the egg to start to set, then lift up a side and tilt the pan to let the yolk run under the part that has started to cook. Do this on several edges, several times. It's OK if you don't cook all of the yolk during this part.

Turn down the heat just a little, sprinkle the top with parmesan cheese, and put a lid on the pan. Allow to cook until the top of the egg gets puffy (the bottom will brown, but don't let it burn). Transfer to a plate and serve!

(Alternately, if you have an oven-proof frying pan, you can put the egg in the oven briefly rather than covering it with a lid on the stove. Again, you'd wait until it got puffy - and in the over it would probably nicely brown a bit on top.)

Sunday, August 22, 2010

(Almost) Pasta Primavera


Says Joef, "If it's good enough for us to eat, it's good enough to post!" There's nothing particularly fancy about this dish - sort of a "what's-left-in-the-fridge" kind of deal - but Joef makes a good point, and it was certainly good enough to eat. I call it *almost* pasta primavera because it's close to a delicious dish my mom makes that has similar ingredients, but adds mushrooms (recommended), for one - and some other veggies that I'm forgetting at the moment. Anyway, the point is that you can improvise, and the results will all be good.

2-3 cloves garlic, chopped
Olive oil
Handful and a half green beans, cleaned and broken into pieces
4-5 on-the-vine tomatoes, chopped
Salt and pepper to taste
Parmesan cheese for serving, grated
3/4 lb pasta, like mezze rigatoni

Get your water boiling and cook the pasta as you cook the sauce. Olive oil (yes, that's a verb now) your pan over medium-high heat. Add all the ingredients, minus the pasta and the cheese, to the pan (if you want crunchier green beans, add those a little later). Cook them until the tomatoes are breaking down; reduce heat if necessary. When the pasta is done, add it right to the pan and cook a minute on low. Serve with plenty of parmesan.

Thursday, August 12, 2010

(Not Just ) Another Tomato Sauce


Alright, it kind of is just another tomato sauce. Another delicious tomato sauce, though, and one that's cheap to make and uses some of the same ingredients that you happen to have lying around the house after making, say, bolognese a couple nights before. This one, my own frequently-changing recipe, uses a few more veggies and is a little chunkier than Smitten Kitchen's simplest tomato sauce, to provide a differentiator.

I actually didn't decide to post this until after I'd finished my first helping. But it was such a crowd-pleaser that I decided to use the excuse of a photograph to take a second helping.

You'll need:

1/2 a white onion, chopped
4 cloves of garlic, chopped/minced
Roughly 6-8 baby carrots, thinly sliced
1 stalk of celery, thinly sliced
3 Roma tomatoes, chopped and lightly salted (new trick I discovered tonight)
olive oil
Dried (or fresh) basil)
1 tbsp butter
1 regular can tomato sauce
1 lb spaghetti rigati, or similar pasta
Salt to taste

Combine the onion, garlic, carrots, celery, tomatoes, and a sprinkle of dried basil in a sauce pan or dutch oven with a liberal drizzle of olive oil. Sautee and stir occasionally over medium-low heat, adding the butter a few minutes in, and until the vegetables begin to soften. Then, add the tomato sauce, a pinch more dried basil, and salt according to your taste. Bring to a boil then simmer, covered, over low heat for about 20 minutes, or while you've boiled water and cooked your pasta. Serve over pasta, with grated parmesan, if you have it.