Showing posts with label dessert. Show all posts

Saturday, October 27, 2012

Homemade Jam

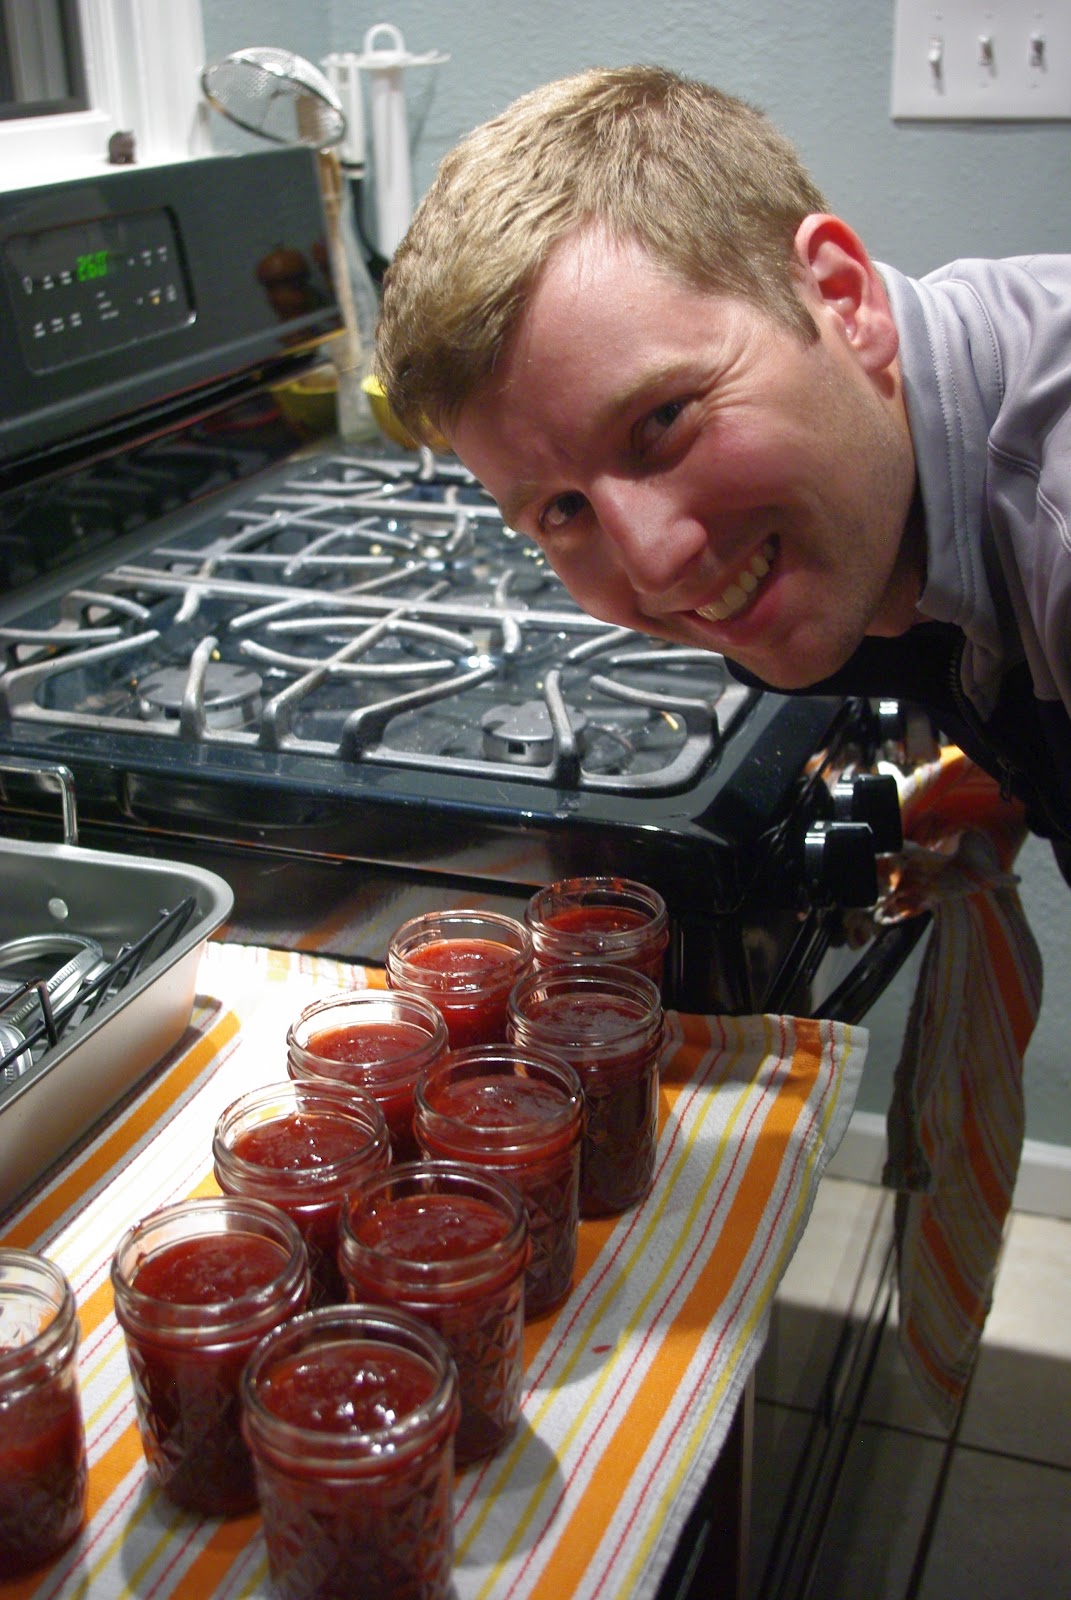
Joef and I recently discovered the joys of making homemade jam. On a whim one night, we went to the local grocery store. I asked the first staff person there where I could find the jamming jars. We found them, and then she hovered around. "What kind of jam are you making?" "Oh, I donno...we were thinking peach?" "Oh." "....Do you, um, have any suggestions?" Did she ever! About twenty minutes later, she had sent us off with recipe ideas, guidance on how to seal and purify the jars, instructions on how to make jam without pectin, proportions...pretty much everything you ever wanted to know about jamming. Including the fact that it's called "jamming", and those who jam regularly are called, as she referred to herself, "jammers".

Well, we've made three jams so far, so we're getting there! They are so delicious and fresh. And it's really not that hard. Especially when Joef does most of the work. We're still experimenting a bit with consistency, probably the toughest thing to master - we've had two that are a little runnier than ideal, and one that's a little chunky, but all three have legitimately been jam. We eat it on toast, waffles, even as ice cream topping.

The three we've made to-date have been: Strawberry-Rhubarb Bourbon, Blackberry-Raspberry Petite Syrah, and Mango. The instructions are essentially the same each time:

7 lbs of your fruit of choice (we pared and halved the strawberries, and cubed and mashed the mangoes)
7 cups of sugar
2 cups booze of your choice (or, in the case of the mango, none at all)
Juice of 1-3 lemons, depending on the sweetness of the fruit and your personal taste
12 jars

Preheat the oven to 260, and wash your jars. Put the jars and the part of the lids without the rubber into the oven for the duration of the cooking.

Combine all of the ingredients into a massive pot. The liquid will obviously boil down faster if you use a wider pot with more space for evaporation. Stir and cook on very high heat until it reaches a rolling boil, then turn down the heat slightly, while still keeping it at a rolling boil, and stir constantly until it thickens and starts to appear somewhat oily and shimmery on the surface (at least 30 minutes). To test its readiness, put a small drop on a spoon and place it in the freezer for three minutes, while continuing to cook the jam. If it's the consistency you'd want your final product to be when it comes out of the freezer, it's done. Otherwise, keep on cooking and freezer-testing as needed.

When your jam is done, take the jars out of the oven, but keep the oven on. Spoon the jam into the jars, and tighten the lids. Place back into oven for twenty minutes.

Your jam is ready when the lids pop and you can't push them down again (it means they're sealed). Once you've opened a jar, store it in the fridge. Enjoy!

Friday, August 17, 2012

Chobani Black Cherry Brownies

(from Chobani)

Time for a Joef recipe, folks (generally, when there's dessert involved, or baking, it's all Joef; he is simply way better at this whole following a precise recipe thing than I am)! On one of our first trips to the grocery store in Berkeley (oh yeah, we moved! It's awesome here!!), we were picking out yogurt, and Joef spotted a recipe for brownies on the back of a Chobani yogurt container. I generally don't get that enthused about desserts, so I reluctantly said yes, let's do it, but you're doing all the baking! Joef happily took up the mantle.

And OhMyGod, am I glad he did. I can't tell you how delicious these are! I mean, I can - they are SO delicious! Moist, flavorful...just, wow. I've heard some of my baking friends talk about using yogurt in their cooking, and now I get it. The fact that it's Greek yogurt adds just that hint of tartness that keeps it from being too, too sweet. Oh man. I want these again.

Here's the recipe, straight off the container:
1 cup black cherry Chobani non-fat Greek yogurt
1 cup sugar
2 large eggs
1 tsp vanilla extract
1/2 cup unsalted butter
1 10oz bag semisweet chocolate chips
3/4 cup all-purpose flour
1/2 tsp salt

Whisk the Chobani, sugar, eggs, and vanilla together in a bowl. Melt the chocolate chips with the butter and let it cool, then whisk it into the Chobani mixture. Last, stir in the flour and salt. Grease an 8-inch baking dish and pour in the brownie mix. Bake at 350 for 35-40 minutes.

Enjoy!

Monday, August 13, 2012

La Piccina Cucina: Camping Edition #2

Every two years or so, Joef and I grab a few innocent and unsuspecting souls and drag them out to the Boundary Waters between Minnesota and Canada. This summer was my third trip and Joef's fifth, and it did not disappoint. It's some of the most beautiful, pristine wilderness I've ever seen, and I'll go back again and again. I mean, what's not to love about canoeing 20 miles a day with portages in between?

Last trip out, I posted about our handpicked blueberry compote. We were a little too early in the season this year for berries, but we did make a point of getting creative with cooking this time around. 

There was the usual fresh-caught fish (bass), fried:

But we also got experimental, with things like modified hummus (chickpeas, garlic, olive oil, sesame seeds, lemon, salt, and zatar are all easy to pack): 
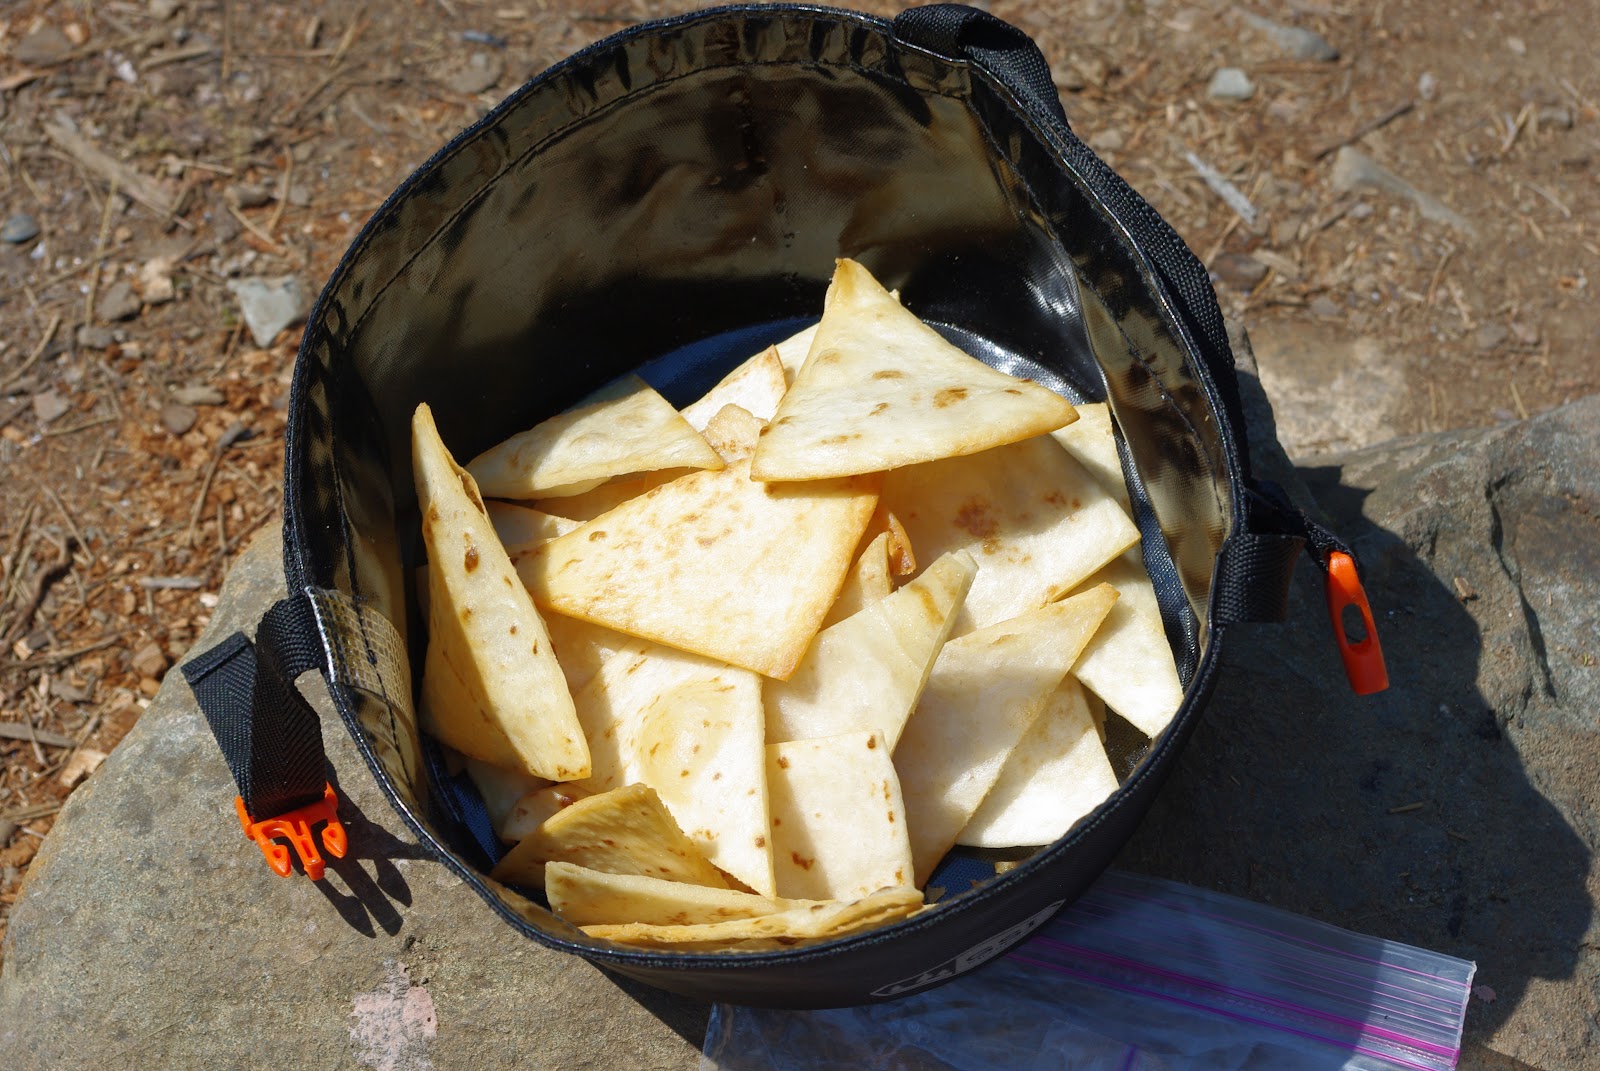
Enjoy them with tortilla chips (cut tortillas into triangles and fry them up):
And we even made pasta, with pesto (paste) and sundried tomatoes:
The coup de grĂ¢ce was cake baked in an orange peel. Now, it should be noted that the final outcome, taste-wise, could probably, er, be improved upon. But the concept is sound! Next time, we'd only fill the oranges halfway, and would either put them on top of the grill, or further from the fire. There was a bit of an ashtray effect. But we MADE CAKE IN THE WILDERNESS! With sparkly frosting!
Choose a batter that doesn't require eggs. Slice just the top off an orange, and scoop out the insides. Mix your batter, and spoon it into the orange.
Secure the top of the orange with toothpicks.
Place the batter-filled orange(s) near the fire. Rotate now and then to heat all sides. Cook for...um...20 minutes? Eyeball it.
Remove the oranges from the fire. Allow to cool, then remove the tops.
Spoon out the cake and dab with frosting!

It was an amazing trip with amazing people. Plus, no injuries! Here we are, just after getting off the water:


Monday, January 16, 2012

Hotcakes (Naga Jolokia Chocolate Cupcakes)

(adapted...heavily...from Martha Stewart's Cupcakes)

Joef's passion for spicy food knows no boundaries. Entrees, mixed drinks, and now desserts. Well, I suppose we broke the dessert barrier with Naga Jolokia hot fudge. But now we've increased our repertoire to include cupcakes, Joef's own creation.

I had to persuade Joef not to bring these as a surprise to a dinner party - all participants were fully warned about the heat factor before indulging. Which is a good thing, because these are really, really spicy. They pack a punch. There is something about Naga Jolokia - a smokiness - that makes them go very well with chocolate. So, while Martha would undoubtedly not approve, they were really yummy, too. Plus, Joef is a way better baker than I am. It's in his blood. I just don't have the patience for the accuracy required.

One-Bowl Chocolate Cupcakes (makes 18)
1 1/2 cups all-purpose flour
3/4 cup unsweetened Dutch-process cocoa powder
1 1/2 cups sugar
1 1/2 tsp baking soda
3/4 tsp baking powder
3/4 tsp salt
2 tsp Naga Jolokia powder
2 large eggs
3/4 cup buttermilk
3 tbsp vegetable oil
1 tsp pure vanilla extract
3/4 cup warm water

Preheat your oven to 350, and line standard muffin tins with paper liners. With an electric mixer on medium, whisk together all the dry ingredients - flour, cocoa, sugar, baking soda, baking powder, salt, and Naga Jolokia. Do not breathe the mixture in - it'll burn. Reduce speed on your mixer to low, then add eggs, water, buttermilk, oil, extract, and water. Beat until smooth and combined, scraping down sides of bowl as needed.

Divide the batter evenly among the lined cups, filling each about 2/3 full. Bake, rotating tins halfway through cooking time, about 20 minutes (or until a piece of spaghetti inserted into the centers comes out clean). Transfer to wire racks to cool for about 10 minutes, then remove cupcakes from the tins and let them cook completely before topping with frosting (see below).

Fluffy Vanilla Frosting (makes about 4 cups, way more than you need)
3 sticks unsalted butter, room temperature
4 cups confectioners sugar, sifted
1/2 tsp pure vanilla extract

With an electric mixer, beat butter on medium-high until pale and creamy, about 2 minutes. Reduce speed to medium, and add sugar, 1/2 cup at a time, beating well after each addition and scraping down the sides. After every two additions, raise the speed to high and beat 10 seconds to aerate the frosting, then return to medium. This process should take about 5 minutes, and the frosting should be very light and fluffy.

Add the vanilla and beat until frosting is smooth. Bring to room temp before using, then beat on low speed until smooth again for about 5 minutes.

Thursday, October 20, 2011

Coconut-Lime Semifreddo


Man, I am behind on everything lately. Well, behind on Cucina posts, and behind on my "52 Weeks of Pancake" series on Flickr (contrary to what you might expect, not food-related).

Back when it was blazing-hot and The Bachelorette was still on (yes, I know, for shame), our friend Jessica invited the gals over for, what else, The Bachelorette - and some delicious eats. She had sangria made with rose, peaches, pears, etc.; salad with tzatziki dressing (best idea ever); slices of french bread, baked with slices of brie and topped with a sweet onion chutney; and this, coconut-lime semifreddo. Pretty damn impressive menu, right? I wanted to make everything - and so far, I've made this!

It's kind of a fascinating dish to make. I mean, it's like ice cream, but it's not. And even on that super-hot day when she made it, it hardly got melty. So it's a nice alternative to ice cream, in that season.

Her semifreddo turned out better than mine, I admit - I had a few spots where I didn't mix the condensed milk in quite enough and those spots got a tad sweet. Overall, though, it was delicious - a really yummy, different, refreshing, and impressive-looking dessert.

By the way, this makes enough for entertaining - you eat it in thin slices, and the recipe makes a bread-sized loaf. It was pretty hilarious making it for just Joef and myself.

So, here is Jessica's recipe:
1 can unsweetened coconut milk
1 can sweetened condensed milk
1 tablespoon finely-grated lime zest
1/4 teaspoon coarse salt
1 1/2 cups cold heavy cream
1/2 cup sweetened shredded coconut, toasted
1/2 ripe mango (the riper, the better)
Line a 4 1/2-by-8 1/2-inch loaf pan with parchment paper (I used aluminum foil - it works, but it's less than optimal - your semifreddo will come out crinkly). Toast coconut flakes by putting them in a frying pan over medium heat and tossing occasionally until they just start to get golden brown. Prepare a large bowl of ice water.

In a medium saucepan, combine coconut and condensed milk and bring to a boil over high. Reduce heat and cook at a rapid simmer, stirring frequently, until thickened, 10 minutes. Remove from heat and stir in lime zest and salt. Place saucepan in bowl of ice water and stir until mixture is cool, 4 minutes.

In a large bowl, using a mixer, beat cream on high until stiff peaks form, 2 minutes. Gently fold whipped cream into the coconut milk mixture. Pour into loaf pan; evenly sprinkle coconut on top. freeze until firm, 6 hours (or covered up to 3 days). Let sit 20 minutes before serving (it's better this way, believe me). Invert onto serving platter. Layer mango on top. Enjoy!

Friday, May 20, 2011

Fried Sweet Plantains

(from Tyler Florence's recipe on FoodNetwork.com)

Well, fry me in butter and sugar, and call me hooked on plantains! This recipe is a doozy when it comes to fat content, but mmm, oh-so good. The sauce was just perfect. I mean, I guess you can't really miss with brown sugar and butter. The cinnamon was really nice, too. And they are simple and quick. We had them as a side, but I think they'd make a good dessert or accompaniment to breakfast.

Next time, I'd cook them a little longer than the original recipe called for (I've made that adjustment below). Also, I'd love to try a version cooked in ramekins in the oven - you'd slice up the plantains, mix them with brown sugar, cinnamon, and vanilla, put maybe 1 tbsp. of butter in each ramekin (1/2 tbsp on top, 1/2 on bottom?), then bake them up for a few minutes and have 'em for breakfast. Whaddya think?

But here's how I did it this time:

3 ripe, black plantains
5 tbsp unsalted butter, divided
1 tsp ground cinnamon
1 tsp natural vanilla extract
2 tbsp brown sugar

To peel the plantains: first, cut off ends and discard. Then, with a paring knife, make 3 shallow slits lengthwise along the seams of the skin and peel away. Cut the plantains in half lengthwise.

Heat 4 tbsp of the butter in a large skillet and place over medium-low heat. Fry the plantains in a single layer, until golden on the bottom, then flip with a spatula. Add the cinnamon, vanilla, and sugar and let cook a couple more minutes, until the sugar begins to caramelize and the other side of the plantain has started to turn golden.

Just before serving, melt remaining tablespoon of butter to finish the sauce. Serve immediately.

Monday, May 16, 2011

Chocolate Lava Cake

(from...sigh...Woman's Day)

This is how much I love my husband: I, against my better judgment, bought a copy of Woman's Day magazine because it had a picture of a chocolate lava cake on the cover ("We *heart* this 15-minute warm chocolate dessert!") and it seemed like he might die of privation if we didn't go home and make it immediately. And yes, yes, the cake was worth the obnoxious magazine purchase.

This is the second time I've made these, and I will say there is one thing I can't figure out. The recipe says you're supposed to take the ramekins out of the oven, let them sit for under a minute, and then flip them over to let the cake drop out. Number one, those things are baking-hot and it's not easy to maneuver a ramekin with giant oven mitts on. Number two, I just can't get them to pop out all nice and pretty. Some of the cake inevitably gets left behind in the ramekin. Maybe if I let it sit in there longer. In any case, I gave up and opted for just serving it right in the ramekin. Now, this means you can't see the melty, molten chocolate center (it's there, I tell you!), but hey. Use your imagination.

For two mini-cakes:
4 tbsp unsalted butter (gasp), plus more for the ramekins
1 tbsp flour, plus more for the ramekins
1/3 cup bittersweet chocolate chips (these are a few of my favorite thiiiiiings...)
1 large egg + 1 large egg yolk
2 tbsp granulated sugar

Heat oven to 450. Butter two 6 oz ramekins and dust the insides with flour.

Place the butter and chocolate in a glass bowl and microwave on high in 20-second intervals, stirring after each, until the chocolate is melted and smooth.

Using an electric mixer, beat the egg and sugar in a medium bowl until thick and lighter in color, about 1 minute. Add the melted chocolate and flour and beat until combined and smooth.

Divide the batter between the two ramekins, and bake until the edges are set, about 8-10 minutes. (Here's where it gets...difficult.) Let stand for 15 seconds. Run a knife around the edge, then invert each cake onto a plate (if you figure this out, tell me; otherwise, just eat it out of the ramekin). Dust with confectioner's sugar if you have it, and garnish with mint if you just happened to have made mint juleps.

Sunday, April 24, 2011

Betty's Strawberry Bread


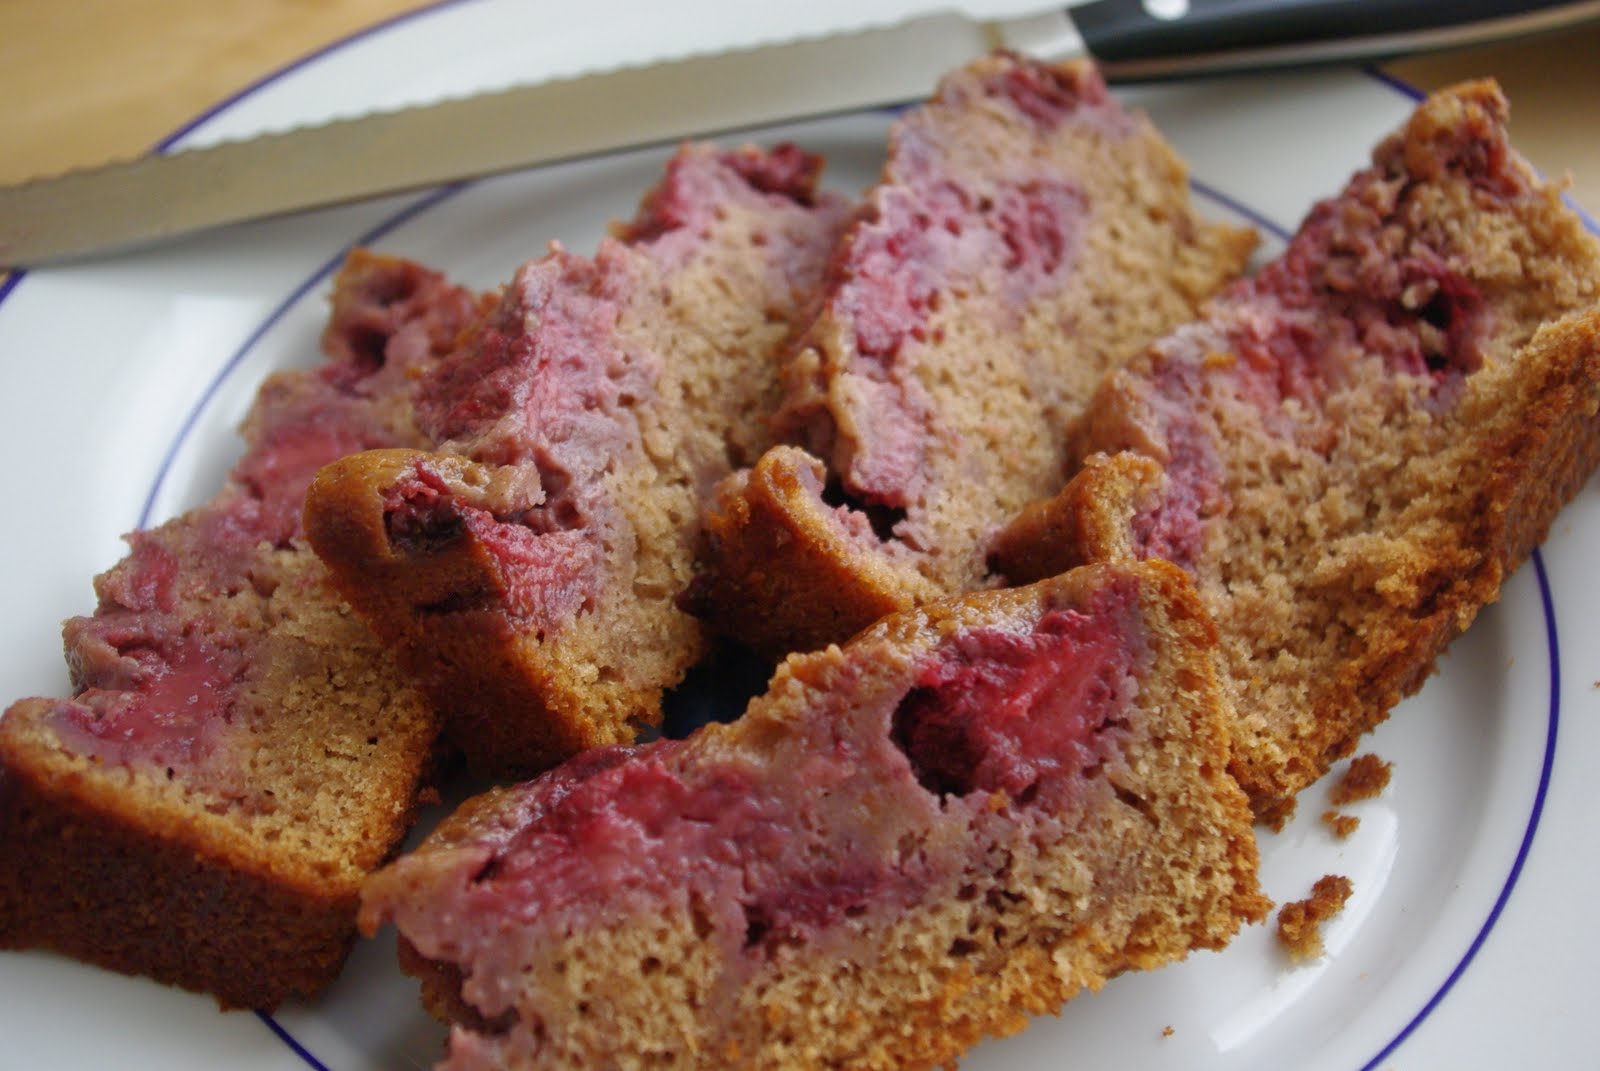
Another great recipe from my mother-in-law, Betty. We hadn't made this since college - long overdue. It's simple and delicious. Just think banana bread, only with...can you guess? Strawberries!

We kept the strawberries whole for this one, but you could blend them, chop them, or do half chopped and half whole. I kind of like the big bites of strawberry you get when you bite into the bread.

This made two lovely loaves.

3 cups flour
2 cups sugar
1 tsp cinnamon
1 tsp salt
1 tsp baking soda
4 eggs, beaten
2 16 oz packages frozen strawberries, thawed
1/4 cup vegetable oil

Preheat the oven to 350.

Mix the dry ingredients in a large bowl, then stir in the eggs. Stir in the strawberries - this will significantly moisten the dough. Stir until evenly mixed, then stir in the oil until incorporated. Divide between two bread pans. Cook in the oven for 1 hour.

Sunday, March 27, 2011

Chocolate-Spice Cupcakes with Chocolate Ganache Glaze

(from Martha Stewart's "Cupcakes")

It feels like ages since I've made cupcakes! These would be fantastic for Christmas - they have that spice cookie taste and smell (hmm, probably because they use the same spices). And they were great for late March, too! I picked these because I shockingly had nearly all the ingredients in the house.

I can't get enough of this frosting, too. It's so, so good. Messy and chocolate-y and just perfect. Easy to make, too.

If you're Martha Stewart and you have access to things like candied ginger, you could top these with that and make 'em even better.

CUPCAKES (makes 12)
5 tbsp unsalted butter, room temp, plus more for cupcake tin
1/4 cup unsweetened cocoa powder, plus more for cupcake tin
1 tsp baking soda
2/3 cup boiling water
1 1/4 cups flour
1/4 tsp salt
1 tsp ground ginger
3/4 tsp ground cinnamon
1/4 tsp ground nutmeg
1/2 cup packed brown sugar
1 large egg
2/3 cup unsulfured molasses
Chocolate ganache glaze (below)

Preheat the oven to 350. Brush a muffin/cupcake tin with butter, then dust with cocoa powder and tap out the excess. Stir baking soda into the boiling water.

In a small bowl, combine the flour, cocoa, salt, ground ginger, cinnamon, and nutmeg.

With an electric mixer on medium-high, combine the butter and brown sugar until pale and fluffy. Beat in the egg. Add the molasses and the baking soda water and beat until combined. Reduce the speed to low, and add the flour mixture, beating until well-combined.

Divide the batter evenly among the cups of the tin, filling each about halfway. Bake, rotating the tin halfway through, about 20 minutes. (While cooking, make the ganache glaze.)

Remove from oven and cool for about 15 minutes. Remove from the tin and let cool completely before spooning the ganache glaze over each cupcake. Enjoy memories of Christmas past!

CHOCOLATE GANACHE GLAZE
6 oz semisweet chocolate chips
2/3 cup heavy cream
1 tbsp light corn syrup

Place chocolate in a small saucepan or heatproof bowl.

Bring cream and corn syrup just to a simmer in a small saucepan over medium-high heat. Pour the hot mixture over the chocolate. Let it stand without stirring until the chocolate begins to melt.

Use a flexible spatula to gently stir the chocolate and cream together until totally combined. It helps to begin near the center of the bowl and slowly work your way out. Don't overstir. Will be smooth and glossy.

Sunday, January 9, 2011

Cherries Jubilee


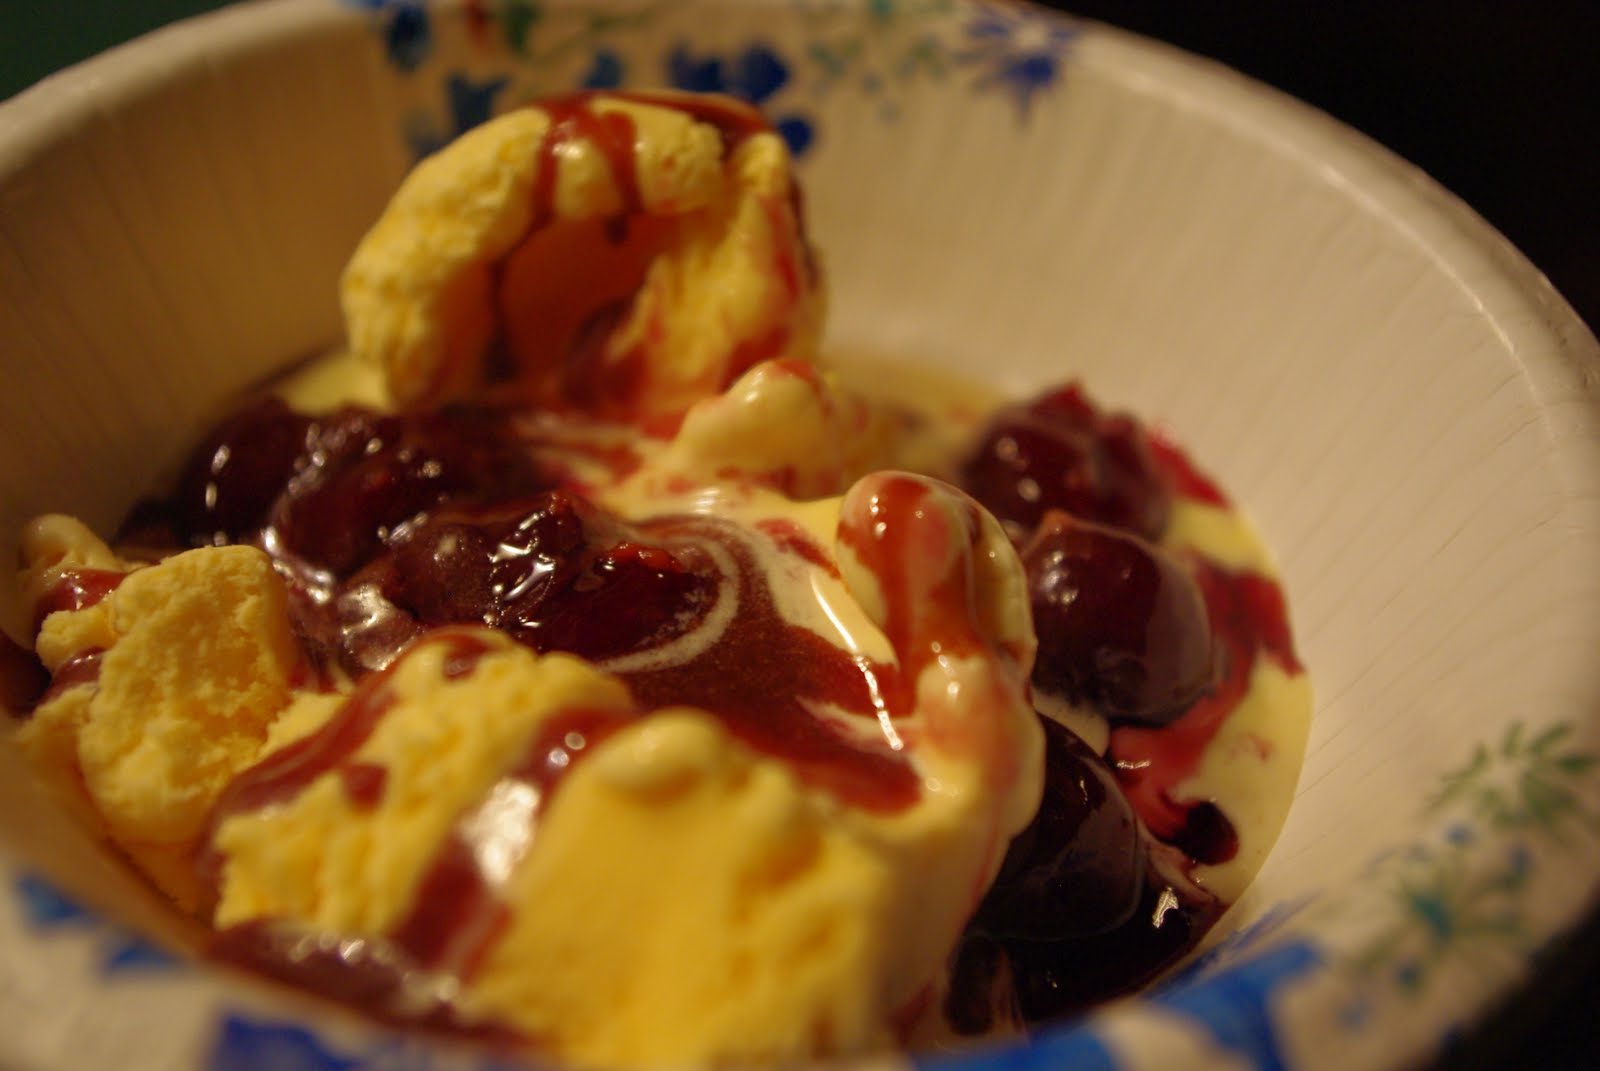
I realize I'm a little behind on my posts - still catching up with the holidays. More than a week after New Year's Eve, here's a traditional Hatton New Year's Eve recipe: Cherries Jubilee. This recipe comes from Joef's mom, and Joef made it for friends this year while we were staying at a cabin in New York. Not only is this delicious - you set it...wait for it...on FIRE! A great way to ring in the new year.

Serve over ice cream, with hot fudge (Indian Ghost Pepper optional). Serves 6-8.

1 can pitted dark sweet cherries, drained and with liquid reserved
1/4 cup sugar
1 tbsp cornstarch
1 tbsp grated orange peel
Drambuie

In a small saucepan, combine the reserved cherry liquid, sugar and cornstarch, then cook over medium heat until thick and bubbly, about 2 minutes. Remove from heat and stir in orange peel and pitted cherries. Warm the Drambuie in a separate saucepan over low-medium heat.

Place the mixture in a flat casserole dish or chafing dish. Pour the warmed Drambuie directly onto the cherries and light immediately before serving over ice cream.

Tuesday, December 14, 2010

Coconut Cupcakes with White Chocolate Frosting


(from Martha Stewart's Cupcakes)

My oh my, it's been a bit of a food dry spell over here, hasn't it? Well, two posts today to make up for it. First, these cupcakes - white chocolate ganache frosting (adapted from Martha's regular recipe), with coconut flakes and coconut milk in the cupcake batter. I will say that they didn't taste that coconut-y, which was surprising. Maybe it's because I used low-fat coconut milk. Another thing I'd try next time would be to sprinkle shredded coconut on top.

Makes about 20 cupcakes.

CUPCAKES
1 3/4 cups all-purpose flour
2 tsp baking powder
1/2 tsp salt
1/2 cup packed sweetened shredded coconut (plus more for topping, if you choose)
1 1/2 sticks unsalted butter, room temp
1 1/3 cups sugar
2 large whole eggs, plus 2 egg whites
1 1/2 tsp vanilla extract
3/4 cup unsweetened coconut milk

Preheat the oven to 350. Place paper liners in cupcake/muffin tins. In a bowl, combine flour, baking powder, and salt. Grind the coconut in a food processor and add to flour mixture.

Mix butter and sugar with an electric mixer on medium-high - allow to become pale and fluffy. Gradually beat in the whole eggs, whites, and vanilla. Reduce speed to low and add the flour mixture in three batches, alternating with two rounds of coconut milk. Beat until combined.

Pour the batter evenly into the cupcake tins, filling each 3/4 full. Bake, rotating once, until a piece of spaghetti inserted into the middle of one comes out clean - should take about 20 minutes. Remove from oven and allow to cool completely, then top with frosting.

GANACHE
22 oz white chocolate chips
2 1/3 cups heavy cream
1/4 cup white corn syrup

Put chocolate chips in a large, heatproof bowl. Bring the cream and corn syrup just to a simmer over medium-high heat, then pour mixture over chocolate. Let it stand until the chocolate begins to melt. Then, beginning in the center, stir the chocolate into the cream until it's combined and smooth, being careful not to over-stir. Refrigerate, stirring every five minutes, until the frosting begins to hold its shape. I didn't let my frosting refrigerate long enough - and, as you can see, it was plenty messy. Still tasted good, but, you know. So - if you have the patience, refrigerate the frosting long enough for it to get more firm - 30-60 minutes, depending on how it comes out and your own preference.

Sunday, November 28, 2010

HOT Fudge (with Indian Ghost Pepper)


Ah, the quest for the elusive Indian Ghost Pepper. Last week, Joef and I were visiting our friends Ali and Patrick in Boston. We found ourselves at a local spice shop, where Joef asked if they sold Indian Ghost Pepper. The reply: "Yes, we do." (Joef's heart leaps.) "But we don't have it today." (Joef's heart falls.) "We usually have it every day." (Joef's heart falls further, and he proceeds to pout for the next few hours.)

This past weekend in New York, we were taken to another spice shop - and this time, we called ahead. Yes, indeed, they could supply Indian Ghost Pepper. And so we came to possess a probably lethal quantity of this spice, which, you see, is generally recognized as the hottest chili in the world. And now Joef can be happy again.

Then it came to what we might actually do with this stuff, and Joef's sister had the rather brilliant idea of adding it to hot fudge. Joef's mom, Betty, whipped up a batch of her unbeatable hot fudge sauce - half made with ghost pepper powder, and another half made with raspberry flavoring for the more sane among us.

Alright, so - was it good? Joef loved it. I have to admit that it was a really nice combination of flavors, the sweet and the smoky-spicy. I also have to admit that it had a semi-numbing effect on my mouth, and yes - it's crazy spicy - and yes, I just had a taste. But we did what we set out to do, and I can now say that I've truly had hot fudge.

Betty's recipe:
1 cup white sugar
2 tbsp cocoa powder (like Hershey's)
Pinch of salt
1 tbsp white caro syrup/corn syrup
Half-and-half - enough to make kind of a chocolate "soup" - Maybe 1/2 cup
1 tbsp butter
Flavoring of choice:
-1 tsp vanilla, or
-1 tsp raspberry flavoring, or
-Dash of Indian Ghost Pepper (which was quite spicy - adjust to taste)

Combine all ingredients except the butter and flavoring in a small pot. Bring to a boil while stirring. Cook until chocolate will completely coat a metal spoon - dip a spoon in, and if it comes out patchy, keep cooking until it coats the spoon. Remove from heat and add butter and flavoring of choice. Let the butter melt, then stir just enough to combine (stir too much, and it'll get grainy and loose the right consistency). Serve over ice cream!

(UPDATE: As of 12/3/2010, Naga Jolokia has been replaced by the Naga Viper chili pepper as the hottest in the world. But when we made this, Naga Jolokia reigned supreme!)

Joef's Candied Yams


Joef's Thanksgiving tradition is these yams. They are also his ultimate comfort food. I have to say, I was dubious about these yams at first, despite their being a fairly traditional - as I've learned - Thanksgiving dish. My family, too, was skeptical when Joef made these for our first Thanksgiving together. But I have to say I've come around, and my family brings them up (with yearning, in some cases) every year now. They are incredibly simple and deliciously sweet.

3-4 yams, peeled and sliced into circles
Brown sugar
Marshmallows, big or small (Joef prefers the big ones)

Preheat oven to 375. Take a square or rectangular baking dish and arrange sliced yams in the dish. Top with generous amounts of brown sugar. Really generous amounts. Place in oven and cook until yams are soft and brown sugar has turned to liquid. Cover the top with marshmallows, then pop back in the oven to allow the marshmallows to brown (making sure they don't, er, catch fire). Remove from oven and serve!

Sunday, October 24, 2010

Blueberry Cupcakes for Ali


(from Martha Stewart's "Cupcakes")

Hmmm, Blueberries for Sal...My best friend Ali, whom I've known since 6th grade, came to visit with her fantastic fiance, Patrick this weekend. It just so happened to be Ali's birthday, so we celebrated with these delicious cupcakes. They're definitely the easiest cupcakes I've made yet; I will say that they turned out a little messier than Martha's looked (probably because of the liquid released by the blueberries), but hey - they tasted great. The topping is a simple whipped cream, with a little sugar added.

So, for 30 cupcakes:

BATTER
1 1/2 cups all-purpose flour
1 1/2 cups cake flour (not self-rising)
1 tbsp baking powder
1/2 tsp salt
1 cup (2 sticks) unsalted butter, room temp
1 3/4 cups sugar
4 large eggs
2 tsp pure vanilla extract
1 1/4 cups milk, room temp
1 1/2 cups fresh blueberries, plus more for garnish

Preheat overn to 350. Line muffin tins with paper liners.

Mix together flours, baking powder, and salt. In a separate bowl, combine the butter and sugar with a handheld mixer on medium-high until pale and fluffy. Beat in the eggs one at a time, then beat in the vanilla.

Reduce the speed to low and add the flour mixture in three batches, alternating with two additions of milk. Mix in blueberries by hand.

Divide the batter evenly in the tins, filling each cup 3/4 full. Bake, rotating halfway through, for about 25 minutes. Allow them to cool, then top (see below).

TOPPING
2 cups heavy cream
1/4 cup confectioner's sugar

Whip with a handheld mixer until thick. Dollop onto cupcakes once they've cooled, then top with more blueberries.

Tuesday, September 7, 2010

Boston Cream Pie Cupcakes


(from Martha Stewart's "Cupcakes")

Yesterday was Joef's and my one-year anniversary (!). Celebrations included running a 5K (you'll know why when you read this recipe), dinner at Pacifico (raw bar platter, shrimp ceviche, plantains, and duck quesadillas, mmmm), an upcoming stint in Cape Cod - and, these cupcakes.

Most people know how I feel about cakes and cupcakes, etc. I generally prefer, say, some ceviche or duck quesadillas, if they happen to be around. But I gotta say, there's a big difference when sweet things are made right - and (thanks to Martha Stewart), these were.

A shout-out to my other inspiration for the cupcakes - my mother-in-law, Betty - who makes a mean Boston Cream Pie that is pretty much one of Joef's favorite things in the world. I'm not sure these can top the actual "pie", but they're a fun alternative.

So, to make 20:

CUPCAKES
6 tbsp unsalted butter, cut into pieces, plus more for tins
1 1/2 cups flour, plus more for tins
1 1/2 tbsp baking powder
1/2 tsp salt
1/2 cup milk
3 large eggs
1 cup sugar
1 tsp pure vanilla extract
Pastry Cream (see below)
Chocolate Ganache Glaze (see below)

1. Preheat the oven to 350. Grease muffin tins with butter and dust with flour, tapping out excess. Whisk together flour, baking powder, and salt. Combine milk and butter in a saucepan and set over very low heat.

2. With an electric mixer on high speed, whisk eggs and sugar into thick, fluffy, and pale yellow - about 5 minutes. (The mixture should be able to hold a drop of itself on its surface for a couple seconds when you lift the mixer.) Reduce speed to medium, and gradually add the flour mixture, whisking just until it combines.

3. Bring the milk and butter just to a boil. With mixer on low, add the hot milk to the batter in a slow, steady stream, and mix just until smooth. Beat in the vanilla.

4. Divide batter evenly among prepared cups. (Note - the recipe says to fill the cups halfway; I ended up the first round with cupcakes that were too small and went for 3/4 full the next time around. Use your judgment based on the kind of muffin or cupcake tins you have.) Bake, rotating tins halfway through, until the cupcakes are golden and a cake tester comes out clean - about 15 minutes. Let tins cool for about 10 minutes, then remove the cupcakes from the tins and let them cool completely.

5. To finish, use a serrated knife to split the cupcakes in half horizontally. Spread about 1 tbsp pastry cream on the bottom half of each cupcake. Spoon about 1 tbsp chocolate glaze over the top of each cupcake. Refrigerate for about 30 minutes before serving, if you can wait that long.

PASTRY CREAM
(Two notes: one, Joef and I agreed that while this filling was delicious, if you were strapped for time, you could probably use a mix. Two, I just realized that I used egg yolks and whites by accident when I made mine. Hmmm. Well, they turned out fine - but you, you follow the recipe, gosh darn it!)
4 large egg yolks
1/2 cup sugar
1/4 cup cornstarch
Pinch of salt
2 cups milk
1 1/4 tsp pure vanilla extract

1. Whisk the egg yolks until smooth in a large bowl.
2. Combine sugar, cornstarch, and salt in a medium saucepan, and heat over medium. Stirring constantly, gradually add the milk in a slow, steady stream, and cook until the mixture thickens and begins to bubble. (Be patient.)
3. Whisking constantly, slowly pour about 1/3 of the milk mixture into the egg yolks (you do this first to prevent curdling). Now pour this into the remaining milk mixture in the saucepan. Cook over medium heat, whisking constantly, until the mixture boils and is thick enough to hold its shape. Remove from heat and stir in the vanilla.
4. Strain the mixture through a fine sieve (gets rid of any pieces of egg white). Cover with plastic wrap, pressing it right onto the surface to keep a skin from forming. Directions say to refrigerate until chilled and firm, about 2 hours - but who has time for that? I popped it in the freezer until the cupcakes were ready to go, but I found it a little too stiff. I'd probably just go with the fridge next time.

CHOCOLATE GANACHE GLAZE
6 oz semisweet chocolate chips
2/3 cup heavy cream
1 tbsp light corn syrup

1. Place chocolate in a small saucepan or heatproof bowl.
2. Bring cream and corn syrup just to a simmer in a small saucepan over medium-high heat. Pour the hot mixture over the chocolate. Let it stand without stirring until the chocolate begins to melt.
3. Use a flexible spatula to gently stir the chocolate and cream together until totally combined. It helps to begin near the center of the bowl and slowly work your way out. Don't overstir. Will be smooth and glossy. And delicious.

Wednesday, September 1, 2010

Archana's Apple Brownies


(from Archana, who got it from Jessica, who got it from...)

My friend Archana was generous enough to share this delicious recipe with me after our apple-picking excursion. I loved this recipe not just because it tastes amazingly good, but because it's simple. And my experience with baking to-date has been complicated and time-consuming. Don't get me wrong - it's still fun, and the results are worth it, but it's also nice to know you can whip up something sweet without too much effort.

I'm going to give it to you just as she gave it to me. Pass it on!

"1 C. softened butter
1 3/4 C. sugar
2 eggs
1 tsp. vanilla
2 C. flour
1 tsp. baking powder
1 tsp. baking soda
1 tsp. cinnamon
1/2 tsp. salt
2 C. chopped apples (i have done them by hand or in a cuisinart)

combine butter and sugar. add eggs and vanilla. in a separate bowl, combine the dry ingredients. mix with wet ingredients until just moistened. fold in apples. bake in a greased pan at 350 for 45 minutes. can put a glaze on it made of 1/2 C. powdered sugar and 1/4 tsp. vanilla.

they are magical."

Yes, yes they are.

Sunday, August 29, 2010

Peach Hand Pies


(filling and concept adapted from Smitten Kitchen)

I've been wanting to make hand pies ever since the first time I heard the phrase "hand pie". There is something incredibly appealing about that term - it just sounds so comforting and delicious. So when I found myself with more fruit than I could possibly eat before it went bad after a fruit-picking (apples, peaches, and asian pears!) trip to a local orchard, it was time to fulfill the dream, as it were. And this time, I remembered to use my mom's much-easier-and-equally-delicious crust recipe, this time. Bonus!

FILLING
2 pounds of peaches
1/4 cup flour
1/4 cup sugar, plus - I used more because my peaches weren't quite ripe
Pinch of salt
1 teaspoon bourbon, if you have it - I used drambuie
1/2 teaspoon vanilla extract

Peel and chop the peaches into small chunks. Mix them with the flour, sugar and pinch of salt, and add the drambuie and vanilla. Add more sugar to taste. Set aside for awhile if you have the time - I let them sit for about an hour plus.

CRUST
1 1/2 cups flour
1 stick butter, cut roughly into tablespoons
1-2 tbsp sugar
1/4 cup cold water

EXTRAS
1 large egg + 1 tbsp water, beaten - to act as the glaze
Extra sugar for dusting

The less you handle the crust mixture, the better - it makes for a flakier crust. Combine the flour, sugar, and butter in a bowl, and mix with your hands until fluffy and combined. Add the cold water, and again mix with your hands until you have dough that you can roll out. Add flour if it's getting too sticky.

Place floured wax paper on your counter and roll out the dough on the paper (lightly flour the rolling pin, too) until it's about the thickness you want for your crust. Use a bowl to cut out circles of dough. My first roll-out made about three rounds - I prepped those, then rolled out the dough again and repeated the process. Do this until you've used all your dough. I had seven and a half pies by the end; I also had leftover filling. (If you want a bigger filling-to-crust ratio, you might make them larger so as to fit more filling.)

The filling process works this way: place your rounds of crust on an ungreased baking pan/sheet. Brush the circumference of each with your egg mixture, then spoon in some filling on one side of the round. Fold the other side of the round over the filling, and press the edges of the crust together. Use the back of a fork to make a design on the edges, and poke a couple of holes in the crust with the fork. Then, lightly brush more egg mixture over the top of the pie, and sprinkle with a little sugar.

Once the pies are filled, place them in the fridge for about 20 minutes while you preheat the oven to 375. Then place the baking sheet with the pies in the oven and cook until golden brown, about 20-30 minutes. Remove from the oven and allow to cool a bit. Then enjoy - eat them right from your hands!


Sunday, July 4, 2010

Tiramisu


(from Loukie Werle's "Italian Country Cooking")

The husband loves dessert. The husband really loves tiramisu. So when I saw that my new cookbook had a recipe for it, I knew I'd be making it soon.

I also got about halfway through this recipe and realized, wait a minute, you never cook the eggs. Nope. Who knew? Well, we had fresh backyard chicken eggs again, and we haven't gotten sick yet, so it seems like we're good to go. But if you wanted to play it safe, you could also buy pasteurized eggs at the grocery store and substitute those in.

The verdict on the tiramisu from the husband: "One of the best I've had!" And not too hard, either!

3 eggs, separate
1 cup sugar
2 cups mascarpone
3 tbsp brandy (recipe called for sweet Marsala, but it worked) - more if you want
1/4 cup grated dark chocolate
18-24 ladyfingers
1 1/2 to 2 cups freshly made strong coffee, room temp

Combine the egg yolks and sugar in a bowl and whisk until pale (keep whisking - it'll happen). Fold in the mascarpone.

In another bowl, beat the egg whites until they form soft peaks. Add the brandy and half the grated chocolate. Beat again until you have soft peaks. Fold this into the mascarpone mixture.

Place a layer of ladyfingers in the bottom of a rectangular baking dish. Pour half the coffee over the ladyfingers, soaking them well. Spread half the mascarpone mixture over the top, then layer on another set of ladyfingers, then coffee, then mascarpone. Sprinkle the rest of the grated chocolate on the top, then refrigerate for at least 4 hours before serving.

...

And that rounds out a great Fourth of July weekend (celebrated, apparently, primarily with Italian cooking) - celebratory dinner at Inka Heritage, Madison Farmer's Market, Bloody Marys with walleye & eggs at the Old Fashioned, boating on Lake Monona, being cooked for while snacking on great cheese, watching - and maybe setting off - fireworks from a friend's (thanks, Justin!) penthouse balcony overlooking the lake. I guess there are a few things I'll miss about Madison.

Watermelon Smoothies


This was an old college favorite, and it's still great today. This is one of Joef's recipes, and it's great for summer - and Fourth of July weekends!

He used light ice cream this afternoon as an experiment, and we couldn't taste the difference. Not that this is in any way light. But...well, we try.

Here's all you do: combine roughly 1 part seedless watermelon and 1 part vanilla ice cream in a blender (more ice cream if you want it thicker, less if you don't). Blend and serve!

Sunday, May 16, 2010

Devil's Food Cupcakes


(from Martha Stewart's "Cupcakes")

I think - no, I know - this was the first time I had cupcakes (by choice) on my birthday. What is this brave new world? The only catch with these was that the icing just didn't come out as planned at all. I mean, it was gooey and delicious, but something must've gone wrong somewhere, because it didn't look like cupcake icing. I'd recommend the icing I used for the Devil's Food Chocolate Layer Cake.

(Makes 12 cupcakes - for easier measurements, and more cupcakes, double the amounts below)
3/8 cup unsweetened cocoa powder
3/8 cup hot water
1 1/2 cups flour
1/2 tsp baking soda
1/2 tsp baking powder
5/8 tsp coarse salt
1 1/2 sticks unsalted butter
1 1/8 cups sugar
2 large eggs, room temp
1/2 tbsp plus 1/2 tsp pure vanilla extract
1/2 cup sour cream, room temp
(Plus frosting)

1. Preheat oven to 350. Line muffin tins with paper liners. Whisk together cocoa and hot water until smooth. In another bowl, whisk together flour, baking soda, baking powder, and salt.

2. Melt the butter with the sugar in a saucepan over medium-low heat, stirring to combine. Remove from heat and pour into a mixing bowl. Turn your electric mixer to medium-low speed and beat until mixture is cooled. Add eggs one at a time, beating until each is incorporated. Add vanilla, then cocoa mixture, and beat until combined. Reduce speed to low and add the flour mixture in two batches, alternating with the sour cream, beating until just combined after each addition.

3. Divide the batter evenly among lined cups, filling each 3/4 full. Bake, rotating tins halfway through cooking. At about 20 minutes, use a piece of spaghetti to test if the cupcakes are done by inserting it into a cupcake and seeing if it comes out clean.

4. Remove cupcakes from oven and allow to cool before spreading cupcakes with frosting.